Development tips (Use of common-module, calls to API, knowledge sharing and so on)
Add restful service for assertions statistics in MBV
To add a restful service that will be used by the AssertionManager, you have to :
- add in the dependency of your project, the ejb module, the jar mbval-documentation-ejb, with the version 0.9 or later
- add in the dependency of your project, the war module, the jar mbval-documentation-war, with the version 0.9 or later
- you have to add also the two module into your ear configuration as ejb and web module
- finally you have to add on the web.xml of your war module :
  <!-- REST web service -->
    <context-param>
        <param-name>resteasy.jndi.resources</param-name>
        <param-value>${yourProjectContextName}/AssertionWSProvider/local</param-value>
    </context-param>
    <context-param>
        <param-name>resteasy.servlet.mapping.prefix</param-name>
        <param-value>/rest</param-value>
    </context-param>
    <context-param>
        <param-name>resteasy.use.builtin.providers</param-name>
        <param-value>true</param-value>
    </context-param>

    <!-- resteasy -->

    <listener>
        <listener-class>org.jboss.resteasy.plugins.server.servlet.ResteasyBootstrap</listener-class>
    </listener>

    <servlet>
        <servlet-name>Resteasy</servlet-name>
        <servlet-class>org.jboss.resteasy.plugins.server.servlet.HttpServletDispatcher</servlet-class>
    </servlet>

    <servlet-mapping>
        <servlet-name>Resteasy</servlet-name>
        <url-pattern>/rest/*</url-pattern>
    </servlet-mapping>
Example of use :
http://k-project.ihe-europe.net/XDStarClient/rest/testAssertion/coverage/all
http://k-project.ihe-europe.net/XDStarClient/rest/testAssertion/coverage/idScheme?idScheme=CLO
Add restfull webservice to get Version of tools
To add a restful service that will be used by all tools, you have to :
- Add in dependencies in your ejb if not already present :
<dependency>
	<groupId>net.ihe.gazelle.maven</groupId>
	<artifactId>version</artifactId>
	<version>1.0.2</version>
	<type>ejb</type>
</dependency>
<dependency>
	<groupId>org.jboss.resteasy</groupId>
	<artifactId>resteasy-jaxrs</artifactId>
</dependency>
<dependency>
	<groupId>org.jboss.resteasy</groupId>
	<artifactId>resteasy-jaxb-provider</artifactId>
</dependency>
<dependency>
	<groupId>org.jboss.seam</groupId>
	<artifactId>jboss-seam-resteasy</artifactId>
</dependency>
<dependency>
	<groupId>org.scannotation</groupId>
	<artifactId>scannotation</artifactId>
	<version>1.0.2</version>
</dependency>
- Create file in ejb/src/main/resources/gzl.version.properties with content :
buildVersion=${build.version}
- Finally you have to add in the web.xml :
<!-- Resteasy -->
	<context-param>
		<param-name>resteasy.jndi.resources</param-name>
		<param-value>gazelle-proxy/VersionProvider/local</param-value>
		<!--If you need to declare more than one resource, separate them by comas -->
	</context-param>
	<!-- The following lines are required only if you decide not to use the application base path as base URI for your REST services -->
	<context-param>
		<param-name>resteasy.servlet.mapping.prefix</param-name>
		<param-value>/rest</param-value>
	</context-param>
	<!-- end of optional lines -->
	<listener>
		<listener-class>org.jboss.resteasy.plugins.server.servlet.ResteasyBootstrap</listener-class>
	</listener>
	<servlet>
		<servlet-name>Resteasy</servlet-name>
		<servlet-class>org.jboss.resteasy.plugins.server.servlet.HttpServletDispatcher</servlet-class>
	</servlet>
	<servlet-mapping>
		<servlet-name>Resteasy</servlet-name>
		<url-pattern>/rest/*</url-pattern>
	</servlet-mapping>
You can verify with the url like this : http://gazelle.ihe.net/proxy/rest/version
Calling EVSClient from a remote application
EVSClient exposes a servlet to handle the validation requests from other applications. A new module entitled gazelle-evsclient-connector will help you with sending your validation queries to the EVSClient tool.
Module identification
| groupId | net.ihe.gazelle |
| artifactId | gazelle-evsclient-connector |
| type | jar |
| version | 1.0.0 |
Content
This module contains two main classes and an interface.
- net.ihe.gazelle.evsclient.connector.api.EVSClientResults : Queries the REST web service of the EVSClient tool to retrieve the validation results
- net.ihe.gazelle.evsclient.connector.api.EVSClientServletConnector : Sends your validation request to EVSClient
- net.ihe.gazelle.evsclient.conector.model.EVSClientValidatedObject : Must be implemented by the java object that you intent to send to EVSClient
Usage
First of all, the Java classes which defines objects that you want to send to the EVSClient shall implement EVSClientValidatedObject and override the 3 methods. Below is an example from gazelle-model-tm
public class TestStepsData extends AuditedObject implements Serializable, Comparable, EVSClientValidatedObject {

	// [...]

// this is the value used as externalId by EVSClient, the couple (externalId, toolOid) SHALL
// be unique through EVSClient to ensure the retrieval of results
	@Override
	public String getUniqueKey() {
		return "stepdata_" + id;
	}

	@Override
	public PartSource getPartSource() {
		String filepath = getCompleteFilePath();
		File fileToValidate = new File(filepath);
		if (fileToValidate.exists()) {
			String content = null;
			content = Base64.encodeFromFile(filepath);
			return new ByteArrayPartSource(getType(), content.getBytes(Charset.forName("UTF-8")));
		} else {
			return null;
		}
	}

	@Override
	public String getType() {
		return "stepdata";
	}
Then, simply call the sendToValidation method:
public void getValidationLink(TestStepsData tsd) {
		if (tsd.isFile()) {
			EVSClientServletConnector.sendToValidation(tsd, FacesContext.getCurrentInstance().getExternalContext(),
					getEvsClientUrl(), ApplicationPreferenceManager.getStringValue("app_instance_oid"));
		}
	}
or retrieve results by using one of the static methods from EVSClientResults
public String getLastResultStatus(String proxyId) {
		String result = EVSClientResults.getLastResultStatusByExternalId(proxyId,
				ApplicationPreferenceManager.getStringValue("gazelle_proxy_oid"), getEvsClientUrl());
		if (result == null) {
			result = "not performed";
		}
		return result;
	}

	public String getLastResultStatusByTmId(String tmId) {
		String result = EVSClientResults.getLastResultStatusByExternalId(tmId,
				ApplicationPreferenceManager.getStringValue("app_instance_oid"), getEvsClientUrl());
		if (result == null) {
			result = "not performed";
		}
		return result;
	}

	public String getValidationStatus(String oid) {
		String result = EVSClientResults.getValidationStatus(oid, getEvsClientUrl());
		if (result == null) {
			result = "not performed";
		}
		return result;
	}

	public String getValidationPermanentLink(String oid) {
		String result = EVSClientResults.getValidationPermanentLink(oid, getEvsClientUrl());
		if (result == null) {
			result = "not performed";
		}
		return result;
	}

	public String getValidationPermanentLinkByProxyId(String proxyId) {
		String result = EVSClientResults.getLastResultPermanentLinkByExternalId(proxyId,
				ApplicationPreferenceManager.getStringValue("gazelle_proxy_oid"), getEvsClientUrl());
		if (result == null) {
			result = "not performed";
		}
		return result;
	}
Nothing else to do !
EVSClient configuration
In EVSClient, you need to add an entry in the Calling Tool list (from Administration menu) in order to tell the tool from where the results come. In this way, the EVSClient will be able to send back the result of the validation to your tool (only the OID is sent and can be reused in the future to retrieve the status and link of the validation report).
If your tool is neither a Gazelle proxy nor a Gazelle Test Management instance and you want the EVSClient to send back the result, you need to update the sendBackResultToTool() method from XMLResultDisplayManager and AbstractResultDisplayManager classes.
Enable TM to access test reports in simulators
From version 1.25 of simulator-parent, a feature enables the simulator to offer a REST web service to other applications; the one returns an XML report for a given test performed between a SUT and the simulator. What we call a test here, is an exchange between the simulator and the SUT, that means a request and one (or more) response(s).
Actually, during the pre-connectathon testing period, connectathon managers need the vendor to return logs as evidence of their successful (or not) tests against tools. In order to enable the simulators to provide such a report, a REST web service has been put in place. Developers, in order to enable this feature in your simulator, you need to:
- extend the TestReport abstract class
- update the WEB-INF/web.xml file of your simulator
- check your database entries in app_configuration table
The report will be produced in respect with the xsd file available here.
Note that to produce such a report, your simulator must be able to perform the appropriate matching between request and responses.
1. extend the TestReport abstract class (package: net.ihe.gazelle.simulator.ws)
Your new class must extend TestReport and implement TestReportLocal. Do not forget to annotate your class with @Stateless (javax.ejb.Stateless).
Abstract methods to override are:
protected TestReport newInstance(String testId, String test);
This first method should return a TestReport object with at least all the required attributes populated. That means that this method should instanciate a new object, call the setTestResults() method and returns the newly created object. testId argument stands for the id of the test as defined by you and test is the kind of test (defined by you too) if your simulator support different kinds of test (for instance DICOM and HL7 exchanges might not be stored in the same table). Note that the "test" param is optionnal if your tool supports only one kind of test.
protected void setTestResults();
This second method is used to populate the attribute of the TestReport object using the information retrieved into the database using the testId and the test arguments given in the REST request. A Message structure is at your disposal to enter the different information retrieved for each message exchanged during the test.
protected EntityManager createEntityManager();
This last method is used to instanciate the EntityManager. As the REST web service is a stateless bean, you cannot use the EntityManager managed by Seam.
An example of such a class is available in the HL7Common-ejb module (see net.ihe.gazelle.HL7Common.ws.HL7v2TestReport).
2. Update the WEB-INF/web.xml file of your simulator
Add the following lines in the web.xml file of the WEB-INF directory of you WAR module:
<!-- REST web service -->
<context-param>
 <param-name>resteasy.jndi.resources</param-name>
 <param-value>${contextRoot}/${RESTServiceName}/local</param-value>
</context-param>
<context-param>
 <param-name>resteasy.servlet.mapping.prefix</param-name>
 <param-value>/rest</param-value>
</context-param>
<listener>
 <listener-class>org.jboss.resteasy.plugins.server.servlet.ResteasyBootstrap</listener-class>
</listener>
<servlet>
 <servlet-name>Resteasy</servlet-name>
 <servlet-class>org.jboss.resteasy.plugins.server.servlet.HttpServletDispatcher</servlet-class>
</servlet>
<servlet-mapping>
 <servlet-name>Resteasy</servlet-name>
 <url-pattern>/rest/*</url-pattern>
</servlet-mapping>
Replace ${contextRoot} by the root context of your application (you can retrieve it in the pom.xml file of your EAR module) and replace ${RESTServiceName} by the name of the class you have created which implements TestReportLocal. If you have already a REST web service deployed, only complete the resteasy.jndi.resources param by adding ${contextRoot}/${RESTServiceName}/local separate from the other parameterse by a coma.
3. check your database entries in app_configuration table
The methods implemented in TestReport abstract class require entries in your database. Before running the new feature, make sure the application_url and application_name values are stored in the app_configuration table of your application.
Finally, compile and deploy your application, if everything is OK you should be able to access http://localhost:8080/${contextRoot}/rest/Hello. Then you will be able to retrieve the test report using URL http://localhost:8080/${contextRoot}/rest/GetReport?id=3&test=DICOM for instance.
Last tip, a static method from the TestReport class (buildTestReportRestUrl(Integer testId, String test)) can be used to build the URL to use to access the REST web service for a given object (identified by its id) and test (is optionnal if only one kind of test is supported by your tool). As an example see http://gazelle.ihe.net/OrderManager/message.seam?id=11 and http://gazelle.ihe.net/OrderManager/rest/GetReport?id=11
EntityManager, HQL queries, HQL filters …
To easily retrieve the EntityManager
Create a new class in your project which extends AbstractEntityManagerProvider (this class comes from gazelle-seam-tools-jar)
create a new file at ${YOUR_EJB}/src/main/resources/META-INF/services/net.ihe.gazelle.hql.providers.EntityManagerProvider which contains the full name of the class (package + class name) of the class which extends AbstractEntityManagerProvider
How to use it ?
EntityManager entityManager = EntityManagerService.provideEntityManager();
Gazelle Tag Library
We have defined some JSF tags for our needs, find below what they do and how to use them.
Using Gazelle tags
Your project should have a dependency to gazelle-seam-tools module. You can choose gazelle-tools as the parent of your project:
<parent>
	<groupId>net.ihe.gazelle.maven</groupId>
	<artifactId>gazelle-tools</artifactId>
	<version>2.110</version>
</parent>
- Update the pom.xml file located in your UI project
 <dependency>
	<groupId>net.ihe.gazelle.maven</groupId>
	<artifactId>gazelle-seam-tools-war</artifactId>
	<type>war</type>
</dependency>
- Update the pom.xml file locate in your EJB project
<dependency>
	<groupId>net.ihe.gazelle.maven</groupId>
	<artifactId>gazelle-seam-tools-jar</artifactId>
	<type>ejb</type></dependency>
- Update the faces-config.xml file locate in your UI project (src/main/webapp/WEB-INF folder) by adding the following lines after the </application> tag
<component>
	<component-type>net.ihe.gazelle.common.tag.PDFFont</component-type>
	<component-class>net.ihe.gazelle.common.tag.PDFFont</component-class>
</component>
<component>
	<component-type>gazelle-link</component-type>
	<component-class>net.ihe.gazelle.common.tag.LinkComponent</component-class>
</component>

<component>
	<component-type>gazelle-imagelink</component-type>
	<component-class>net.ihe.gazelle.common.tag.ImageLinkComponent</component-class>
</component>

<component>
	<component-type>gazelle-date</component-type>
	<component-class>net.ihe.gazelle.common.tag.DateComponent</component-class>
</component>

<component>
	<component-type>gazelle-safehtml</component-type>
	<component-class>net.ihe.gazelle.common.tag.SafeHtmlComponent</component-class>
</component>
If you want to use one of those tags in your XHTML, add a reference to the tag library: xmlns:g="http://www.ihe.net/gazelle"
Available tags
| Tag | Description |
| g:date | Displays a date, time or timestamp according to the time zone set in the database |
| g:imagelink | Displays an image with a link embedded |
| g:link | Builds a permanent link to the specified object and displays a specific label |
| g:pdffont | Used in Seam PDF to set the font to be used (allows a correct display when values are in Japanese for instance) |
| g:safehtml | Displays a string containing HTML tags but only keeps a set of allowed tags |
| g:column | Extend rich:column to integrate a filtering and sorting shortcut (jboss7 only) |
Date (g:date)
Displays a date, time or timestamp according to the time_zone set in the database.
| Attribute name | Type | Description | Default |
| value | java.util.Date | The date to be displayed | NULL |
| date | boolean | Indicates if we must display the date | TRUE |
| time | boolean | Indicates if we must display the time | TRUE |
| tooltip | boolean | Indicates if a tooltip shall be displayed to give the time zone. If set to false the time zone is added at the end of the string | FALSE |
The value of the time zone is loaded from the database or the local is used.
You may have an entity which manage the preferences of your application. To know where to look for the time_zone property, the system needs to know how to access those properties. To do so, you need to create a new class which implements the PreferenceProvider interface and be annotated with @MetaInfProvider. Then, do not forget to create an entry in your preference table with key time_zone. (Example of value: Europe/Paris). If you are developing a simulator and use a recent version of simulator-parent, you do not need to create any class, only check the presence of time_zone variable in app_configuration table.
Image Link (g:imagelink)
This tag behaves like the h:outputLink component except that the value attribute refers to an object and that an icon is displayed. The targeted link will be created depending on the type of the object.
| Attribute name | Type | Description | Default |
| value | java.lang.Object | The object targeted by this link | NULL |
| icon | Text | The icon to display | NULL |
| fontIcon | Text | a font flat icon (ex: "fa fa-info-circle text-info") | NULL |
| width | Positive integer | Width of the icon (in pixels) | NULL |
| height | Positive integer | Height of the icon (in pixels) | NULL |
| target | Text | Where to open the link | NULL |
| styleClass | Text | css class to apply to this component | NULL |
| rendered | boolean | Indicates whether to render or not the component | TRUE |
To use this tag, you need to implement a class which will be used by the component to compute the URL of the object to display. To do so, create a new class which implements the LinkDataProvider interface (from package net.ihe.gazelle.common); annotate this class with @MetaInfServices(LinkDataProvider.class).
Below is an example from gazelle-x-validation module.
@MetaInfServices(LinkDataProvider.class)
public class CrossValidatorLinkDataProvider implements LinkDataProvider {

	public static final CrossValidatorLinkDataProvider instance(){
		return new CrossValidatorLinkDataProvider();
	}

	private static List<class<?>> supportedClasses;

	static {
		supportedClasses = new ArrayList<class<?>>();
		supportedClasses.add(GazelleCrossValidatorType.class);
		supportedClasses.add(Rule.class);
	}

	@Override
	public List<class<?>> getSupportedClasses() {
		return supportedClasses;
	}

	@Override
	public String getLabel(Object o, boolean detailed) {
		StringBuilder label = new StringBuilder();
		if (o instanceof GazelleCrossValidatorType){
			GazelleCrossValidatorType validator = (GazelleCrossValidatorType) o;
			label.append(validator.getName());
			label.append(" - ");
			label.append(validator.getAffinityDomain());
			if (detailed){
				label.append(" (");
				label.append(validator.getVersion());
				label.append(')');
			}
		} else if (o instanceof Rule){
			Rule rule = (Rule) o;
			label.append(rule.getKeyword());
			if (detailed){
				label.append(" (");
				label.append(rule.getVersion());
				label.append(')');
			}
		}
		return label.toString();
	}

	@Override
	public String getLink(Object o) {
		StringBuilder url = new StringBuilder();
		if (o instanceof GazelleCrossValidatorType){
			GazelleCrossValidatorType validator = (GazelleCrossValidatorType) o;
			url.append("/xvalidation/doc/validator.seam?id=");
			url.append(validator.getId());
		} else if (o instanceof Rule){
			Rule rule = (Rule) o;
			url.append("/xvalidation/doc/rule.seam?id=");
			url.append(rule.getId());
		}
		return url.toString();
	}

	@Override
	public String getTooltip(Object o) {
		// TODO Auto-generated method stub
		return null;
	}
Then, you can use the g:imagelink tag as follows:
 <g:imagelink value="#{rule}" icon="/img/icons64/kfind.gif" styleClass="tableIcon" height="22px" width="22px"/>
 <g:imagelink value="#{rule}" fontIcon="fa fa-info-circle text-info"/>
Note that either the icon (+ optionally height and width) or the fontIcon attribute is mandatory. fontIcon attribute is available from version 2.0.2 of gazelle-tools.
Link (g:link)
This tag behaves like the h:outputLink component except that the value attribute refers to an object and that the text displayed is a pre-defined label. The targeted link will be created depending on the type of the object.
| Attribute name | Type | Description | Default |
| value | java.lang.Object | The object targeted by this link | NULL |
| tooltip | boolean | Indicates whether to display or not a tooltip | FALSE |
| rendered | boolean | Indicates whether to render or not the component | TRUE |
| styleClass | Text | css class to apply to this component | NULL |
| detailed | boolean | Uses a longer label as displayed text | FALSE |
This component uses the same mecanisms as the g:imagelink component, that means that you need to implement the LinkDataProvider interface.
PDF Font (g:pdffont)
pdffont component is used in p:document to defined the font to be used. You can also use the p:font component of the PDF Seam library but we created this tag because we encountered some issues when displaying Japanese characters.
| Attribute name | Type | Description |
| size | Integer | The point size of the font |
| style | Text | The font styles. Any combination of: NORMAL, BOLD, ITALIC, OBLIQUE, UNDERLINE, LINE-THROUGH |
| color | Text | The font color |
| embedded | boolean | Indicates whether to embedd the font in the final PDF or not |
Safe HTML (g:safehtml)
Rendered HTML strings after removing a set of not allowed HTML tags and attributes. Owasp policy is also applied.
Allowed tags are "p", "div", "h1", "h2", "h3", "h4", "h5", "h6", "ul", "ol", "li", "blockquote", "caption", "center", "cite", "col", "colgroup", "em", "pre", "q", "table", "tbody", "td", "tfoot", "th", "thead", "tr"
Allowed attributes are
- "href" and "target" for "a" tag
- "alt", "src", "border", "height" and "width" for "img" tag
- "border", "height", "width", "cellspacing", "cellpadding", "bgcolor", "fgcolor", "valign"
| Attribute name | Type | Description |
| value | java.lang.String | The HTML string to be displayed (HTML tags will be interprated) |
Column (g:column)
Provides built-in sorting and filtering to richfaces4 dataTable column.
added attributes are
- "sortBy", "filterBy" and "sortOrder".
| Attribute name | Type | Description |
| sortBy | java.lang.String | Defines a bean property which is used for sorting of a column. |
| filterBy | java.lang.String | Defines iterable object property which is used when filtering performed. |
| sortOrder | java.lang.String | SortOrder is an enumeration of the possible sort orderings("ascending","descending","unsorted"). Default value is "unsorted" |
Insert (g:insert)
allows to insert and highlight the file from the application context into the page.
highlighting can be customized by overiding the css present in cdk-tags artifact.
Allowed attributes are
- "highlight", "content" and "src".
| Attribute name | Type | Description |
| content | java.lang.String | Defines the String, inserted with this component |
| highlight | java.lang.String |
Highlight is an enumeration of the possible highlighting ("groovy","java","beanshell","bsh","xml","xhtml","lzx","html","cpp","cxx","c++"). Default value is "xml" |
| src | java.lang.String | Defines the path to the file with source code.This attribute is alternative to "content" attribute. |
Spacer (g:spacer)
Spacer is a simple component that renders an invisible image with the given width, height. Usually it is used to separate elements of page design.
Allowed attributes are
- "height" and "width".
| Attribute name | Type | Description |
| height | java.lang.String | The height of the spacer. Default value is "1 px" |
| width | java.lang.String | The width of the spacer. Default value is "1 px" |
Generate Java server code from the wsdl
To generate the java code, server side, from the wsdl, the better way is to use the tool apache-cxf ( http://cxf.apache.org/download.html ) . Unzip this tool and go to the folder bin.
In this folder you will find the script wsdl2java.sh, use it for the generation.
example :
aboufahj@yaka:~/Applications/apache-cxf-2.7.6/bin$ ./wsdl2java -p net.ihe.gazelle.xdstar.validator.ws -all -d /home/aboufahj/tmp/xdsr2/ /home/aboufahj/Documents/workspace/ITI/wsdl/XCARespondingGatewayQuery.wsdl
After generating, there still missing annotations in the generated interfaces, add :
@BindingType(javax.xml.ws.soap.SOAPBinding.SOAP12HTTP_BINDING)
@Addressing(enabled=true)
and on the generated implementation class, you have to add :
@Stateless
HQLQueryBuilder
We can generate some Java classes to easily build HQL queries of type HQLQueryBuilder (this is a set of classes specific to the Gazelle project and available in gazelle-seam-tools module)
Three examples
private SystemActorProfiles getSap(String systemKeyword, String actor, String profile, String option){
	SystemActorProfilesQuery sapQuery = new SystemActorProfilesQuery(em);
	sapQuery.system().keyword().eq(systemKeyword);
	sapQuery.actorIntegrationProfileOption().actorIntegrationProfile().actor().keyword().eq(actor);
	sapQuery.actorIntegrationProfileOption().actorIntegrationProfile().integrationProfile().keyword().eq(profile);
	sapQuery.actorIntegrationProfileOption().integrationProfileOption().keyword().eq(option);
	return sapQuery.getUniqueResult();
}
TestRolesQuery trQuery = new TestRolesQuery(entityManager);
	trQuery.roleInTest().testParticipantsList().tested().eq(Boolean.TRUE);
	trQuery.test().testType().keyword().eq(TestType.TYPE_CONNECTATHON_STRING);
	trQuery.test().testStatus().keyword().eq("ready");
	trQuery.roleInTest().addFetch();
	trQuery.roleInTest().testParticipantsList().addFetch();
	trQuery.roleInTest().testParticipantsList().actorIntegrationProfileOption().addFetch();
	trQuery.roleInTest().testParticipantsList().aipo().addFetch();
	trQuery.roleInTest().testParticipantsList().aipo().systemActorProfiles().system().eq(system);
	trQuery.roleInTest().testParticipantsList().actorIntegrationProfileOption().eq(aipo);
	trQuery.test().keyword().order(true);
	List<TestRoles> roles = trQuery.getList();
}
@Override
public void appendFiltersFields(HQLQueryBuilder<TestInstance> queryBuilder) {
	super.appendFiltersFields(queryBuilder);
	TestInstanceQuery testInstanceQuery = new TestInstanceQuery(queryBuilder);
	if (testingSessionIsNull){
		testInstanceQuery.testingSession().isNull();
	}
	if (testType != null){
		testInstanceQuery.test().testType().eq(testType);
	}else{
		testInstanceQuery.test().testType().keyword().eq(TestType.TYPE_CONNECTATHON_STRING);
	}
}
- TestInstanceQuery
- Class used to execute queries
- Can be built "from scratch", with an entity manager
- Can built from a HQLQueryBuilder, to add constraints
- Implements HQLQueryBuilderInterface<TestInstance>, gathering all the public methods from HQLQueryBuilder
- Inherit from TestInstancePath
- TestInstancePath
- Allow to browse the attributes of the TestInstance entity
- Each attribute is mapped by a method which returns a path (ex : test(), lastStatus(), ...)
- The paths can be browsed by stringing the methods together (testInstanceQuery.test().testType().eq(testType);)
- Paths are strongly typed, we cannot discard it
- Inherit from HQLSafePathEntity (owned a method addFetch()), or from the class "Parent"Path, in order to inherit of its paths.
- A simple path (ex : HQLSafePathBasic<String> description()) is a HQLSafePathBasic, we allow to perform
- a like on String
- a comparison on dates/numbers
- an ordering (order(boolean ascending))
Usage
<build>
	<plugins>
		<plugin>
			<groupId>org.bsc.maven</groupId>
			<artifactId>maven-processor-plugin</artifactId>
		</plugin>
	</plugins>
</build>
Advantages
- Static analysis of the requests at compilation time : existing path, check the type of parameters (In the example above, the type of testType is checked)
drawbacks
- Longer compliation time (generation and compilation of generated classes)
Design
- The creation of an interface for the HQLQueryBuilder (HQLQueryBuilderInterface) shall enable the developer to handle the concept of "requestor" without using the class HQLQueryBuilder. This interface shall also, at the very end, containts the documentation of the API.
- The HQLQueryBuilder remains based on paths, the generated code shall uniquely allow to replace the String by stronly typed Java objects.
- A path always inherit from the HQLSafePath. This class is a path from the HQLQueryBuilder. A lot operations are already available on this path (list of distinct items, eq(), isNull(), ...)
- The paths to the basic types are of type HQLSafePathBasic, which include comparators (ge, like, ...) and the ordering (order).
- The paths to the entities are of type HQLSafePathEntity, the particularity of which is the capability to be fetched at runtime (storage at session level and later retrieval, to avoid the "lazy exception")
- by using the Processor API of JDK6
- with the pugin maven-annotation-plugin
- with code inspired by "jpamodelgen" from JBoss
How to configure jpa-identity-store
If there is this warning message when a Gazelle application is launching :
Warn :[IdentityManager] no identity store available - please configure an identityStore if identity management is required
You need to add in components.xml file of the WEB-INF directory of your main WAR, the following lines
<security:jpa-identity-store
	user-class="net.ihe.gazelle.users.model.User"
    role-class="net.ihe.gazelle.users.model.Role"/>
In user class, add annotations :
- @UserPrincipal on getUsername()
- @UserFirstName on getLastname()
- @UserLastName on getFirstname()
- @UserPassword on getPassword()
- @UserRoles on getRoles()
Make sure that you have the following setter methods: setUsername, setLastname, setFirstname, setPassword and setRoles.
In role class, add annotation :
- @RoleName on getname()
Now the warning message disappeared.
If you also get a warning concerning <security:identity/> and the authenticate method, add the following in your components.xml
<security:identity authenticate-method="#{authenticator.authenticate}"/> How to generate java classes for a specific HL7 v2 message with Hapi from HL7 Message Profile.
In some cases, when we use, for example, EVSClient tool to validate HL7v2 messages, it appears that the validation result is FAILED in spite of we are certain that this validation result should be PASSED.
This problem appears when the message structure defined by IHE is different from the initial message structure defined by HL7. The solution is to generate the message classes, used by Hapi for the validation.
This supposes to create, test, and update the Gazelle HL7 Validator project and the EVSClient project. Follow the steps below :
Generate the classes corresponding to the HL7 message using Hapi and the HL7 Message Profile.
- Get the Data project (gazelle/Data/trunk) from Gazelle's SVN repository, this project contains all the HL7 message profiles used by the Gazelle HL7 Validator tool.
- Get the gazelle-hl7-messagestructures project (Maven/gazelle-hl7-messagestructures/trunk). This is a Maven Project containing all the classes which have been overriden because the ones from Hapi were not correct.
- Check that the HL7 Message Profile you need is available in the Data project; copy the path to this file and go to Gazelle Master Model or Gazelle HL7 Validator to retrieve its OID.
- You will need to generate the package corresponding to this message profile; to do so, open the pom.xml file under the gazelle-hl7-messagestructure project and process as follows :
- In the plugins part, you may either add your new classes to an existing package or create a new package. specify the message profile to use.
Add the generated classes in the Gazelle HL7 Validator project.
- A new version of gazelle-hl7-messagestructures is available in your local Maven repository. To perform some testing, we will first update the dependency of the Gazelle HL7 Validator to match the new SNAPSHOT version of the gazelle-hl7-messagestructures module. Open the pom.xml file available at the root of the Gazelle HL7 Validator project and update the version of the module in the properties (gazelle.hl7.messagestructures.version)
- Compile this new version
- Some unit tests are available in the test forder of the Gazelle HL7 Validator project that you can use to make sure that generating a new version of the classes fixed the issues.
- Once you are fine with the generated class, you can release the gazelle-hl7-messagestructures module and update the Gazelle HL7 Validator to make use of this newly released version of the module.
- Finally, when you update Gazelle HL7 Validator on your server, do not forgot to apply the database updates available in gazelle-hl7-messagestructures/target/import.sql, this will automatically fix the name of the package to be used when calling one of the HL7 message profiles for which classes have been overriden.
Add the generated classes in the EVSClient project. (Used for the HL7 tree)
- You will need to add the library in the EVSClient project. This library will be used by Hapi to construct the HL7 Tree. See the Message Content part in the validation report of the EVSClient.
- To add this library, only update the version of the dependency in EVSClient-ejb/pom.xml.
How to launch Unit tests in project
To explain this, i take gazelle-proxy-ejb as example.
Frist of all, you need to create a class which contains your tests in src/test/java.
In this class you must create methods which execute your tests with @Test above your methods.
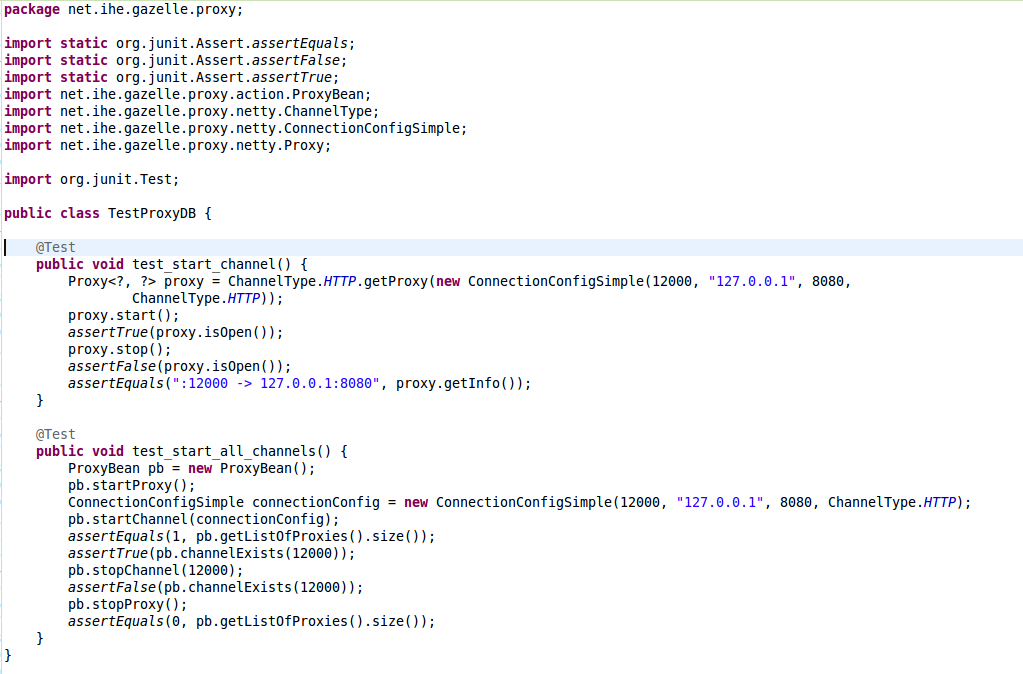
After, you nedd to create a class named AllTests.java in which you add @SuiteClasses({ YourTestsClass.class }):

To finish, you open pom.xml and add maven-surefire-plugin like this :
<plugin>
	<groupId>org.apache.maven.plugins</groupId>
	<artifactId>maven-surfire-plugin</artifactId>
	<version>2.16</version>
	<configuration>
		<forkMode>once</forkMode>
		<argLine>-enableassertions</argLine>
	</configuration>
</plugin>
Your tests will be executed when you launch mvn clean package or mvn test
How to properly call REST web services using resteasy
If you want to easily call a REST web services as the ones we describe in the article entitled "RESTful webservices running on JBoss", you may use Resteasy. Be very careful when you use it because we noticed that the default behaviour of Resteasy does not correctly close the connections (we experienced the issues with resteasy-jaxrs/2.0-beta-2).
We used to write the following code:
ClientResponse<String> response = null;
ClientRequest request = new ClientRequest("http://monurl");
request.queryParameter(idName, id);
response = request.get(String.class);
ClientRequest uses an executor to obtain the response. Without any parameter, a new executor is created for each new request and the connections are not automatically closed. A proposed fix is to use a unique executor that you can defined like this:
private static final ClientExecutor CLIENT_EXECUTOR = new ApacheHttpClientExecutor(new HttpClient(new MultiThreadedHttpConnectionManager()));
[...]
ClientRequest request = new ClientRequest("http://monurl", CLIENT_EXECUTOR);
Internally, ApacheHttpClientExecutor will reuse the same HttpClient for each request with an automatic connection pool.
How to use the C3P0 JDBC connection pool in your Maven Project.
How use the C3P0 JDBC connection pool in your Maven Project.
See the link below for more details about the C3P0 JDBC connection pool :
In the "pom.xml" file of your ejb project :
Add the dependencies below:
<dependency>
 <groupId>c3p0</groupId>
 <artifactId>c3p0</artifactId>
 <version>0.9.1.2</version>
</dependency>
<dependency>
 <groupId>org.hibernate</groupId>
 <artifactId>hibernate-c3p0</artifactId>
 <version>4.2.20.Final</version>
</dependency>
In the "persistence.xml" file of your ejb project, in the <properties> tag, add the property below:
<property name="hibernate.connection.url" value="${jdbc.connection.url}" />
<property name="hibernate.connection.driver_class" value="${jdbc.driver.class}" />
<property name="hibernate.connection.username" value="${jdbc.user}" />
<property name="hibernate.connection.password" value="${jdbc.password}" />
<property name="hibernate.connection.provider_class" value="org.hibernate.connection.C3P0ConnectionProvider" />
<property name="hibernate.c3p0.min_size" value="${min.pool.size}" />
<property name="hibernate.c3p0.max_size" value="${max.pool.size}" />
<property name="hibernate.c3p0.max_statements" value="50" />
<property name="hibernate.c3p0.acquire_increment" value="1" />
<!-- new values for fixing the DB issues with Jboss7 -->
<property name="hibernate.c3p0.idle_test_period" value="40" />
<property name="hibernate.c3p0.timeout" value="30" />
<!-- new properties that fix the DB issues we have in Jboss 7 -->
<property name="hibernate.c3p0.unreturnedConnectionTimeout" value="400"/>
<property name="hibernate.c3p0.debugUnreturnedConnectionStackTraces" value="true"/>
In the parent POM of your project, be sure to have, In the <properties> tag of each <profile> :
<jdbc.connection.url>jdbc:postgresql:your-data-base-name</jdbc.connection.url>
<jdbc.driver.class>org.postgresql.Driver</jdbc.driver.class>
<jdbc.user>username</jdbc.user>
<jdbc.password>password</jdbc.password>
<min.pool.size>1</min.pool.size>
<max.pool.size>3</max.pool.size>
Java interface generation
From gazelle-seam-tools-jar:2.13 the following annotation @GenerateInterface is available, it allows the generation of the Interface from the signature of the class.
The name of the Interface to be generated as to be given as parameter (the package used in the same as the one of the class)
By default, the @Local (from Seam) annotation is added in the interface, if you rather want an interface with the @Remote annotation, it is possible.
Examples
- @GenerateInterface("TotoLocal") -> generates an interface named TotoLocal and annotated with @Local
- @GenerateInterface(value = "TotoRemote", isLocal = false, isRemote = true) -> generates an interfaced named TotoRemote and annotated with @Remote
- @GenerateInterface(value = "TotoLocal2", extendsInterface = "toto.Titi") -> generates an inteface anmed TotoLocal2, annontated @Local and which extends the Titi interface from the toto package
RESTful webservices running on JBoss
JBoss provides a simple way to implement REST webservices, this page explains how to use the RestEasy library.
What is REST ?
REST stands for REpresentational State Transfer, it is based on HTTP/1.1.
A RESTful web service is a simple web service implemented using HTTP and the principles of REST. It is a collection of resources, with three defined aspects:
- the base URI for the web service, such as http://gazelle.ihe.net/RetrieveValueSet
- the Internet media type of the data supported by the web service.
- the set of operations supported by the web service using HTTP methods (e.g., POST, GET, PUT or DELETE).
Pre-requisites
Implementing RESTful web services with RestEasy for a use on JBoss requires JBoss-seam 2.2 or higher and JBoss 5 or higer.
Using RestEasy in a maven project
If you are about to use ReastEasy into a Gazelle maven project, a good way to proceed is to use gazelle-seam Maven project as a parent for your project. Note that version 1.11 of gazelle-seam artifact requires Jboss-seam 2.2.1.Final.
<parent>
<groupId>net.ihe.gazelle.maven</groupId>
<artifactId>gazelle-seam</artifactId>
<version>1.11</version>
</parent>
You EJB module needs to be dependant of jaxrs-resteay, a module from the JBoss community. You will also need to add a dependency to scannotation package. Add the following lines in the pom.xml file of your EJB module.
<dependency>
 <groupId>org.jboss.resteasy</groupId>
<artifactId>resteasy-jaxrs</artifactId>
<version>${version.resteasy}</version>
</dependency>
<dependency>
<groupId>org.scannotation</groupId>
<artifactId>scannotation</artifactId>
<version>1.0.2</version>
</dependency>
Using ${version.resteasy} instead of a static version number maintains the consistency between your project and the libraries supported by the version of JBoss-seam you use.
Implementation
As we do when implementing SOAP web services, adding some annotations in Java classes and interfaces is quitly enough to declare REST services. In addition of these annotations, some updates need to be done in the WEB-INF/web.xml file of your WAR module.
The most basic annotations are exposed here.
First of all, you can choose to customize the URI in which the service will be reachable using the @Path annotation. Note that the base URI ("/") is the base URL of the WAR module. That means that it refers to the main directory of your WAR archive. Then, for each method you will be able to customize the different parameters using either @QueryParam or @PathParameter.
Let's take an example. The project is named TestRest and the web interface will be reachable at http://localhost:8080/TestRest. We will first create a local interface to define two services (Test1 and Test2), the base URI of which will be /resteasy. Consequently, the service will be reachable at http://localhost:8080/TestRest/resteasy/Test1.
import javax.ejb.Local;
import javax.ws.rs.GET;
import javax.ws.rs.Path;
import javax.ws.rs.Produces;
import javax.ws.rs.QueryParam;

@Local
@Path("/") // base URI will be defined in the web.xml file
public interface TestLocal {
/**
* This method will return "Hello username" where username is the string given as parameter
* To call this method the URL to use is http://localhost:8080/TestRest/resteasy/Test1?username=toto
*/
@GET // HTTP GET method
@Path("/Test1") // path of the service
public String test1(@QueryParam("username") String username);

/**
 * This method will return "Welcome username" where username is the string given as parameter
 * To call this method, the URL to use is http://localhost:8080/TestRest/resteasy/Test2/toto
*/
@GET
@Path("/Test2")
public String test2(@PathParam("username") String username);
}
Then, you have to create the stateless bean wich implements this interface as you can show it below.
import javax.ejb.Stateless;

@Stateless
public class Test implements TestLocal {

public String test1(String username)
{
return "Hello " + username;
}

public String test2(String username)
{
return "Welcome " + username;
}
}
Finally, you will have to update the web.xml file contained in your WAR module in order to bind this service and to declare filters. The lines to append to your file are available below.
<context-param>
<param-name>resteasy.jndi.resources</param-name>
<param-value>TestRest/Test/local</param-value>
<!--If you need to declare more than one resource, separate them by comas -->
</context-param>
<!-- The following lines are required only if you decide not to use the application base path as base URI for your REST services -->
<context-param>
<param-name>resteasy.servlet.mapping.prefix</param-name>
<param-value>/resteasy</param-value>
</context-param>
<!-- end of optional lines -->
<listener>
<listener-class>org.jboss.resteasy.plugins.server.servlet.ResteasyBootstrap</listener-class>
</listener>
<servlet> <
servlet-name>Resteasy</servlet-name>
<servlet-class>org.jboss.resteasy.plugins.server.servlet.HttpServletDispatcher</servlet-class>
</servlet>
<servlet-mapping>
<servlet-name>Resteasy</servlet-name>
<url-pattern>/resteasy/*</url-pattern>
</servlet-mapping>
Compile and deploy your application. You should be able to access the web interface at http://localhost:8080/TestRest and the RESTful webservices at http://localhost:8080/TestRest/resteasy
Further documentation
Full JBoss documentation concerning RestEasy is available here.
- Log in to post comments
Gazelle SSO clients for CAS 5.1.5
This article explains how to connect our application with the "new" version of Apereo CAS 5.1.5.
Maven dependencies
In your ejb pom.xml you need to have cas-client-core as dependency.
<dependency>
   <groupId>net.ihe.gazelle</groupId>
   <artifactId>gazelle-cas-client</artifactId>
   <version>1.0.0</version>
</dependency>
Warning, if you have a parent that include the previous cas-client (3.1.10.IHE.1), you must exclude it. Example with simulator-common as parent, you must add the following in you ejb pom.xml :
<dependency>
    <groupId>net.ihe.gazelle.simulators</groupId>
    <artifactId>simulator-common-ejb</artifactId>
    <type>ejb</type>
    <exclusions>
        <exclusion>
            <groupId>org.jasig.cas</groupId>
            <artifactId>cas-client-core</artifactId>
        </exclusion>
    </exclusions>
</dependency>
Web deployment descriptor
Now you need to update the WEB-INF/web.xml file in your war module.
First remove all previous filters and properties that concern the CAS, then add the followings elements :
<context-param>
		<param-name>configurationStrategy</param-name>
		<param-value>PROPERTY_FILE</param-value>
	</context-param>

	<context-param>
		<param-name>configFileLocation</param-name>
		<param-value>/opt/gazelle/cas/file.properties</param-value>
	</context-param>

	<filter>
		<filter-name>CAS Single Sign Out Filter</filter-name>
		<filter-class>org.jasig.cas.client.session.SingleSignOutFilter</filter-class>
	</filter>
	<filter-mapping>
		<filter-name>CAS Single Sign Out Filter</filter-name>
		<url-pattern>/*</url-pattern>
	</filter-mapping>
	<listener>
		<listener-class>org.jasig.cas.client.session.SingleSignOutHttpSessionListener</listener-class>
	</listener>

	<filter>
		<filter-name>Gazelle CAS Authentication Filter</filter-name>
		<filter-class>net.ihe.gazelle.cas.client.authentication.AuthenticationFilter</filter-class>
	</filter>
	<filter-mapping>
		<filter-name>Gazelle CAS Authentication Filter</filter-name>
		<url-pattern>/cas/login</url-pattern>
	</filter-mapping>

	<filter>
		<filter-name>Gazelle CAS logout filter</filter-name>
		<filter-class>net.ihe.gazelle.cas.client.authentication.LogoutFilter</filter-class>
	</filter>
	<filter-mapping>
		<filter-name>Gazelle CAS logout filter</filter-name>
		<url-pattern>/cas/logout.seam</url-pattern>
	</filter-mapping>

	<filter>
		<filter-name>CAS Validation Filter</filter-name>
		<filter-class>org.jasig.cas.client.validation.Cas30ProxyReceivingTicketValidationFilter
		</filter-class>
	</filter>
	<filter-mapping>
		<filter-name>CAS Validation Filter</filter-name>
		<url-pattern>/*</url-pattern>
	</filter-mapping>

	<filter>
		<filter-name>CAS HttpServletRequest Wrapper Filter</filter-name>
		<filter-class>org.jasig.cas.client.util.HttpServletRequestWrapperFilter</filter-class>
	</filter>
	<filter-mapping>
		<filter-name>CAS HttpServletRequest Wrapper Filter</filter-name>
		<url-pattern>/*</url-pattern>
	</filter-mapping>
Then add, still in web.xml the following configuration properties:
<context-param>
    <param-name>configurationStrategy</param-name>
    <param-value>PROPERTY_FILE</param-value>
</context-param>
<context-param>
    <param-name>configFileLocation</param-name>
    <param-value>/opt/gazelle/cas/file.properties</param-value>
</context-param>
The last one indicates where the gazelle-cas-client will find information to connect with the CAS server.
Navigation configuration
You also need to configure your page.xml file to:
- Configure correctly the logout action (logout from CAS not only from the application)
- Keep the URL parameters when user logged in
To do so, configuration the navigation section as shown below
 <page view-id="*">
		<navigation from-action="#{identity.logout}">
			<rule if="#{!applicationConfigurationManager.isWorksWithoutCas()}">
				<redirect view-id="/cas/logout.xhtml"/>
			</rule>
			<rule if="#{applicationConfigurationManager.isWorksWithoutCas()}">
				<redirect view-id="/home.xhtml"/>
			</rule>
		</navigation>
	</page>
	<page view-id="/cas/login">
		<navigation>
			<redirect view-id="/home.xhtml"/>
		</navigation>
	</page>
Menu bar configuration
The links in your menu bar shall look like the following:
<h:panelGroup rendered="#{identity.loggedIn}">
        <li class="dropdown"><a href="#" class="dropdown-toggle"
                                data-toggle="dropdown" role="button" aria-expanded="false">
            <h:outputText
                    id="menuWelcomeId" value="#{credentials.username}"/> <span
                class="caret"/> </a>
            <ul class="dropdown-menu" role="menu">
                <li>
                    <s:link id="menuLogoutId" view="/home.seam"
                            action="#{identity.logout()}"
                            value="#{messages['net.ihe.gazelle.simulators.Logout']}"
                            propagation="none"/>
                </li>
            </ul>
        </li>
    </h:panelGroup>
    <h:panelGroup>
        <li>
            <a4j:commandLink
                    value="#{messages['gazelle.simulator.Login']}"
                    action="#{applicationConfiguration.loginByIP()}"
                    rendered="#{not identity.loggedIn and applicationConfigurationManager.isWorksWithoutCas()}"/>
        </li>
        <li>
            <s:link id="menuLoginCasId" view="/cas/home.seam"
                    value="#{messages['gazelle.simulator.loginCAS']}"
                    rendered="#{not identity.loggedIn and not applicationConfigurationManager.isWorksWithoutCas()}"
                    propagation="none">
<f:param name="request" value="#{request.requestURL}" disable="#{request.queryString != null}"/>
<f:param name="request" value="#{request.requestURL}?#{request.queryString}" disable="#{request.queryString == null}"/>
</s:link> </li> </h:panelGroup>
Configuration
Next step is to create the configuration file declared in your deployment decriptor.
On the system where the application is deployed, create the file /opt/gazelle/cas/file.properties containing:
serverName=http://localhost
casServerUrlPrefix=https://sso.ihe-europe.net/cas
casServerLoginUrl=https://sso.ihe-europe.net/cas/login
casLogoutUrl=https://sso.ihe-europe.net/cas/logout
Clean up
The application preference cas_url is no longer required, think about removing it with an update.sql script in the next release.
Extensions of AuthenticationFilter and Cas20ProxyReceivingTicketValidationFilter classes are no longer requeried, do not forget to remove them.
Gazelle SSO clients for CAS 5.1.5 (Double CAS authentication)
Maven dependencies
Add as dependency in your ejb
<dependency>
<groupId>net.ihe.gazelle</groupId>
<artifactId>gazelle-cas-client</artifactId>
<version>${gazelle.cas.client.version}</version>
</dependency>
Web deployment descriptor
Now you need to update the WEB-INF/web.xml file in your war module.
First remove all previous filters and properties that concern the CAS, then add the followings elements
<filter>
<filter-name>CAS Single Sign Out Filter</filter-name>
<filter-class>org.jasig.cas.client.session.SingleSignOutFilter</filter-class>
</filter>
<filter-mapping>
<filter-name>CAS Single Sign Out Filter</filter-name>
<url-pattern>/*</url-pattern>
</filter-mapping>
<listener>
<listener-class>org.jasig.cas.client.session.SingleSignOutHttpSessionListener</listener-class>
</listener>
<filter>
<filter-name>CAS Validation Filter</filter-name>
<filter-class>net.ihe.gazelle.atna.questionnaire.authentication.GSSDoubleCasTicketValidationFilter</filter-class>
</filter>
<filter-mapping>
<filter-name>CAS Validation Filter</filter-name>
<url-pattern>/*</url-pattern>
</filter-mapping>
<filter>
<filter-name>Gazelle CAS logout filter</filter-name>
<filter-class>net.ihe.gazelle.atna.questionnaire.authentication.GSSDoubleLogoutFilter</filter-class>
</filter>
<filter-mapping>
<filter-name>Gazelle CAS logout filter</filter-name>
<url-pattern>/cas/logout</url-pattern>
</filter-mapping>
<filter>
<filter-name>Gazelle Main CAS Authentication Filter</filter-name>
<filter-class>net.ihe.gazelle.cas.client.authentication.AuthenticationFilter</filter-class>
<init-param>
<param-name>cas</param-name>
<param-value>main</param-value>
</init-param>
</filter>
<filter-mapping>
<filter-name>Gazelle Main CAS Authentication Filter</filter-name>
<url-pattern>/cas/login</url-pattern>
</filter-mapping>
<filter>
<filter-name>Gazelle Second CAS Authentication Filter</filter-name>
<filter-class>net.ihe.gazelle.cas.client.authentication.AuthenticationFilter</filter-class>
<init-param>
<param-name>cas</param-name>
<param-value>second</param-value>
</init-param>
</filter>
<filter-mapping>
<filter-name>Gazelle Second CAS Authentication Filter</filter-name>
<url-pattern>/cas/login2</url-pattern>
</filter-mapping>
<filter>
<filter-name>CAS HttpServletRequest Wrapper Filter</filter-name>
<filter-class>org.jasig.cas.client.util.HttpServletRequestWrapperFilter</filter-class>
</filter>
<filter-mapping>
<filter-name>CAS HttpServletRequest Wrapper Filter</filter-name>
<url-pattern>/*</url-pattern>
</filter-mapping>
This example is for Gazelle Security Suite, the filter-class of Gazelle CAS logout filter and CAS Validation Filter need to be changed if you use this in another tool. The classes must be created in your project :
- One must extends DoubleCas30ProxyReceivingTicketValidationFilter (for the CAS Validation Filter)
- The other must extends DoubleLogoutFilter (for the Gazelle CAS logout filter)
In both case, 3 functions need to be implemented (check on atna-questionnaire to see an exemple) :
public abstract void computeUserSCas(ServletRequest servletRequest);
public abstract CasLogin getCasLoginForUser(ServletRequest servletRequest);
public abstract boolean isSecondCasEnabled();
Then add, still in web.xml the following configuration properties
<context-param>
<param-name>configurationStrategy</param-name>
<param-value>net.ihe.gazelle.cas.client.doubleauthentication.PropertiesConfigurationStrategyImpl</param-value>
</context-param>
<context-param>
<param-name>configFileLocationMainCas</param-name>
<param-value>/opt/gazelle/cas/file.properties</param-value>
</context-param>
<context-param>
<param-name>configFileLocationSecondCas</param-name>
<param-value>/opt/gazelle/cas/file_second_cas.properties</param-value>
</context-param>
The two last one indicates where the gazelle-cas-client will find information to connect with the CAS server.
Navigation configuration
You also need to configure your page.xml file to:
- Configure correctly the logout action (logout from CAS not only from the application)
- Keep the URL parameters when user logged in
To do so, configuration the navigation section as shown below
<page view-id="*">
<navigation from-action="#{identity.logout}">
<rule if="#{!applicationConfigurationManager.isWorksWithoutCas()}">
<redirect view-id="/cas/logout.xhtml"/>
</rule>
<rule if="#{applicationConfigurationManager.isWorksWithoutCas()}">
<redirect view-id="/home.xhtml"/>
</rule>
</navigation>
</page>
<page view-id="/cas/identityLogout.xhtml">
<action execute="#{identity.logout}"/>
<navigation>
<redirect view-id="/home.xhtml"/>
</navigation>
</page>
<page view-id="/cas/login">
<navigation>
<redirect view-id="/home.xhtml"/>
</navigation>
</page>
<page view-id="/cas/login2">
<navigation>
<redirect view-id="/home2.xhtml"/>
</navigation>
</page>
Menu bar configuration
The links in your menu bar shall look like the following (login then logout) :
<li>
<h:outputLink id="menuLoginCasId2" value="#{applicationConfiguration.getValueOfVariable('application_url')}/cas/login">
<h:outputText value="#{applicationAttributes.getMainCasName()}"/>
<f:param name="request" value="#{request.requestURL}" disable="#{request.queryString != null}"/>
<f:param name="request" value="#{request.requestURL}?#{request.queryString}" disable="#{request.queryString == null}"/>
<f:param name="cas" value="main"/>
</h:outputLink>
</li>
<li>
<h:outputLink id="menuLoginCasId3" value="#{applicationConfiguration.getValueOfVariable('application_url')}/cas/login2">
<h:outputText value="#{applicationAttributes.getSecondCasName()}"/>
<f:param name="request" value="#{request.requestURL}" disable="#{request.queryString != null}"/>
<f:param name="request" value="#{request.requestURL}?#{request.queryString}" disable="#{request.queryString == null}"/>
<f:param name="cas" value="second"/>
</h:outputLink>
</li>
Implementing XUA in your simulators
<!-- gazelle-xua-actors-->
<dependency>
    <groupId>net.ihe.gazelle</groupId>
    <artifactId>gazelle-xua-actors-ejb</artifactId>
    <version>1.0.0-SNAPSHOT</version>
    <type>ejb</type>
</dependency>
<dependency>
    <groupId>net.ihe.gazelle</groupId>
    <artifactId>gazelle-xua-actors-war</artifactId>
    <version>1.0.0-SNAPSHOT</version>
    <type>war</type>
</dependency>
Dans le pom de l'ear, ajouter la dépendance vers l'ejb et ajouter ejbModule dans la configuration du plugin
<dependency>
    <groupId>net.ihe.gazelle</groupId>
    <artifactId>gazelle-xua-actors-ejb</artifactId>
    <type>ejb</type>
</dependency>

<ejbModule>
    <groupId>net.ihe.gazelle</groupId>
    <artifactId>gazelle-xua-actors-ejb</artifactId>
    <uri>gazelle-xua-actors-ejb.jar</uri>
</ejbModule>
Dans le pom de l'ejb, ajouter la dépendance
<!-- WS Trust integration -->
<dependency>
    <groupId>net.ihe.gazelle</groupId>
    <artifactId>gazelle-xua-actors-ejb</artifactId>
    <type>ejb</type>
</dependency>
Dans le pom du war
<dependency>
    <groupId>net.ihe.gazelle</groupId>
    <artifactId>gazelle-xua-actors-war</artifactId>
    <type>war</type>
</dependency>
Dans EJB/resources/META-INF/persistence.xml
<jar-file>gazelle-xua-actors-ejb.jar</jar-file>
Dans EJB/resources/META-INF/hibernate.cfg.xml
<mapping class="net.ihe.gazelle.xua.model.PicketLinkCredentials"/>
<mapping class="net.ihe.gazelle.xua.model.XServiceProviderLog"/>
Pour que les assertions soient validées lorsque le web service reçoit le message,
Ajouter l'annotation @HandlerChain à la classe déjà annotée @WebService
@HandlerChain(file = "soap-handler.xml")
Créez le fichier soap-handler.xml dans EJB/src/main/resources/nomDuPackageDeLaClassWebService
<?xml version="1.0" encoding="UTF-8" standalone="yes"?>
<javaee:handler-chains
      xmlns:javaee="http://java.sun.com/xml/ns/javaee">
   <javaee:handler-chain>
      <javaee:handler>
         <javaee:handler-class>net.ihe.gazelle.simulator.common.ihewsresp.WSAddressingHandler</javaee:handler-class>
      </javaee:handler>
   </javaee:handler-chain>
   <javaee:handler-chain>
      <javaee:handler>
         <javaee:handler-class>net.ihe.gazelle.xua.actors.XServiceProvider</javaee:handler-class>
      </javaee:handler>
   </javaee:handler-chain>
</javaee:handler-chains>
Pour envoyer des assertions dans vos messages soap:
protected Element getAssertionFromSTS(String username, String password){
    Element assertion = null;
    if (username != null) {
        String stsUrl = PreferenceService.getString("gazelle_sts_url");
        String appliesToUrl = PreferenceService.getString("sts_default_audience_url");
        XServiceUser xServiceUser = new XServiceUser(stsUrl);
        assertion = xServiceUser.getAssertionForCredentials(username, password, appliesToUrl);
    }
    return assertion;
}

protected void appendAssertionToSoapHeader(SOAPMessage msg, Element assertion){
    try {
        XServiceUser.appendAssertionToSoapHeader(msg, assertion);
    }catch (SOAPException e){
        // nothing to log here
    }
}
Il vous faudra également une préférence: gazelle_sts_url (par défaut: https://gazelle.ihe.net/picketlink-sts) et une préférence sts_default_audience_url (les assertions ne sont valides pour picketlink que si AppliesTo/EndpointReference/address = http://ihe.connectathon.XUA/X-ServiceProvider-IHE-Connectathon)
Si vous voulez que l'utilisateur choisisse son assertion, la classe PicketLinkCredentials permet de stocker les credentials utilisables. Le script cmn_picketlink_credentials permet d'importer toutes celles connues par notre picketlink.
Library in SoapUI
SoapUI is is an web service testing application (SOAP and REST). A large documentation can be found on their website : https://www.soapui.org/getting-started.html
SoapUI provides options for scripting, using either Groovy or Javascript. You can find how to use it in SoapUI here : https://www.soapui.org/scripting-properties/tips-tricks.html
Creation of a script library without SoapUI Pro
The goal of a script library is to store all your script in one place. It will help you organize you project, use your script in several project and share your library to other by exporting it.
To do so you need to create a project and/or a Test Suite (depending if you want to use your library only in one project or not) called “Library” and disable the Test Suite (that way it will not be launch by accident). You will put your script in it and you can organize them by creating several Test Case.
It’s important to encapsulate scripts in a class using the standard objetcs of SoapUI (log, context and testRunner) :
def MyClass{
	def log
	def context
	def testRunner

	//Constructor
	def MyClass(logIn,contextIn,testRunnerIn)
	{
		this.log = logIn
		this.context = contextIn
		this.testRunner = testRunnerIn
	}
}
You can then add methods to the class.
The class need to be instantiate in the script :
context.setProperty( "MyClass", new MyClass(log, context, testRunner))
A script must look like this :
context.setProperty( "MyClass", new MyClass(log, context, testRunner))

def {
	def log
	def context
	def testRunner

	//Constructor
	def MyClass(logIn,contextIn,testRunnerIn)
	{
 		 this.log = logIn
  		this.context = contextIn
  		this.testRunner = testRunnerIn
	}

	//Methods
	def ()
	{
 		//something
	}
}
The script can be loaded in another Test Suite of the project like this :
scripts = testRunner.testCase.testSuite.project.testSuites["Librairy"];
scripts.testCases["Librairy"].testSteps["MyClass"].run(log,testRunner, context);
If you want to use it in another project :
def currentProject = testRunner.testCase.testSuite.project
def repository=currentProject.getWorkspace().getProjectByName("ProjectName")
repository.testSuites["Librairy"].testCases["Librairy"].testSteps["MyClass"].run(log, testRunner, context)
You can then call the method via a groovy script :
context.MaClasse.MyMethod(Parameters);
The same can be done with Test Step instead of scripts : you can add one in your library and you can run it via a groovy script using :
def library = testRunner.testCase.testSuite.project.testSuites["Library"]
def step = library.testCases["MyTestSteps"].testSteps['MyStep']
testRunner.runTestStep(step);
Using properties in the Library
The use of properties in the library is a bit tricky :
If you use them in a script which is in you library, by default it will use the properties from the context of the test case calling the library. It’s a bit abstract so here a example :

In myMethod I want to store a propriety in the Test Case so I write :
testRunner.testCase.setPropertyValue( "MyProp", “someValue” )
If I called this method from “testScript” it will store “MyProp” in the test case “Test1” and not “Library”. If you want to store the properties in the Library you need to specify it :
def library = testRunner.testCase.testSuite.project.testSuites["Library"].testCases["Library"]
library.setPropertyValue("MyProp", "someValue" )
It’s important to have that it mind because the Test Step will use the properties of the context where it’s at. So if you have a SOAP Request in your library and you access a properties using ${#TestCase#MyProp} , it will search the properties in the test case “Library” and not “Test1” unlike the groovy scripts.
Providers and Services
EntityManager
Service: net.ihe.gazelle.hql.providers.EntityManagerService
Provider: net.ihe.gazelle.hql.providers.EntityManagerProvider
User
Service: net.ihe.gazelle.users.UserService
Provider: net.ihe.gazelle.users.UserProvider
Preference
Service: net.ihe.gazelle.preferences.PreferenceService
Provider: net.ihe.gazelle.preferences.PreferenceProvider
ValidatorUsage
Service:
Provider:
How to implement a Provider
Implement the provider interface and annotate your class with @MetaInfService(YourProviderInterface.class), this requires the following dependency:
<dependency>
	<groupId>org.kohsuke.metainf-services</groupId>
	<artifactId>metainf-services</artifactId>
	<version>1.1</version>
	<type>jar</type>
</dependency>
How does it work
Restrict access to application's pages
Commonly, when building a graphical user interface, if you want to restrict the access to some page to a category of users, you create a myPage.page.xml file in which you edit the restriction.
A service has been implemented which enables you to easily manage the permissions; it make use of the Page interface you may have already implemented if you build a dynamic menu. This post is a tutorial to put in place this service. All you need is having a project which depends on gazelle-seam-tools module.
First of all, create a public enumeration which implements the net.ihe.gazelle.common.pages.Authorization interface. This enum must listed the various permissions you want to set, for instance : ADMIN, MONITOR, EDITOR, FULL_MODE and so on. The boolean method isGranted which have to be implemented may make references to basic permissions (Identity.instance().loggedIn(), Identity.instance.hasRole('my_role') ...) or to value in your application preferences or even something else which will help the application knowing if the current user is or is not allowed to access a given page.
public enum Authorizations implements Authorization {

	ALL,

	LOGGED,

	ADMIN,

	EDITOR;

	@Override
	public boolean isGranted(Object... context) {
		switch (this) {
		case ALL:
			return true;
		case LOGGED:
			return Identity.instance().isLoggedIn();
		case ADMIN:
			return Identity.instance().hasRole("admin_role");
		case EDITOR:
			return Identity.instance().hasRole("admin_role") || Identity.instance().hasRole("test_editor_role");
		}
		return false;
	}

}
Then, create a new public enumeration which implements the net.ihe.gazelle.common.pages.Page interface. This enum must listed all the pages which are available through your graphical user interface and for each page, the list of Authorization to be applied. Not that if you are listed several Authorizations, the final Authorization is computed using the logical AND. If you rather want to use the OR operator, you can use the AuthorizationOr class. The AutorizationNot and AuthorizationAnd classes are also available if you need to create complex authorizations based on the ones you have defined in the enum.
public enum Pages implements
		Page {

	HOME("/home.xhtml", "/img/gazelle.png", "Home", Authorizations.ALL),

	APPLICATION_CONF("/admin/configure.xhtml", "/img/configure.gif", "Application configuration", Authorizations.ADMIN),

	LOGIN_PAGE ("/login.seam", "", "", Authorizations.ALL),

	ERROR_PAGE ("/error.seam", "", "", Authorizations.ALL),

	ERROR_EXPIRED_PAGE ("/errorExpired.seam", "", "", Authorizations.ALL);

	private String link;

	private Authorization[] authorizations;

	private String label;

	private String icon;

	Pages(String link, String icon, String label, Authorization... authorizations) {
		this.link = link;
		this.authorizations = authorizations;
		this.label = label;
		this.icon = icon;
	}
....
}
Then, you need to provide a PageLister so that the GazelleSecurityCheck class will be able to retrieve the list of pages available in your application along with the specific authorizations for each of them. This class must implement the net.ihe.gazelle.common.pages.PageLister interface.
@MetaInfServices(PageLister.class)
public class RuleEditorPageLister implements PageLister {

	@Override
	public Collection getPages() {
		Collection pages = new ArrayList();
		pages.addAll(Arrays.asList(XValidationPages.values()));
		pages.addAll(Arrays.asList(Pages.values()));
		return pages;
	}

}
In the above examples, pages come from different modules, each of them declaring the pages it owns in a separate enum.
Finally, update the WEB-INF/pages.xml files of your main WAR project to declare the class which controls the access restriction:
<page view-id="*">
    <restrict>#{gazelleSecurityCheck.checkSecurity()}</restrict>
...
</page>
When a user accesses any page of your application, the GazelleSecurityCheck will be first called to check that he/she is allowed to access the page he/she asked for, if it is not the case, it will be notified by a faces message that he/she is not allowed to access the requested page. You can give a try by accessing a page which requests to be logged without being logged.
SOAP Web service configuration
IHE actors' endpoint
This section of the documentation gives some indication about how to create a SOAP 1.2 endpoint which matches the IHE specifications. Those constraints have to be followed when implementing an IHE actor acting as a webservice responder.
The next sections refer to the code snippet below (extract from PatientManager tool) which defines the PDQ Supplier service (PDQV3)
@Stateless
@Name("PDQSupplierService")
@WebService(portName = "PDQSupplier_Port_Soap12", name = "PDQSupplier_PortType", targetNamespace = "urn:ihe:iti:pdqv3:2007", serviceName = "PDQSupplier_Service")
@SOAPBinding(parameterStyle = ParameterStyle.BARE)
@Addressing(enabled = true, required = true)
@BindingType(javax.xml.ws.soap.SOAPBinding.SOAP12HTTP_BINDING)
@RespectBinding(enabled = true)
@GenerateInterface(value = "PDQSupplierServiceRemote", isLocal = false, isRemote = true)
@HandlerChain(file = "soap-handler.xml")
public class PDQSupplierService implements PDQSupplierServiceRemote {

	private static Logger log = LoggerFactory.getLogger(PDQSupplierService.class);
	private static final String HL7_NS = "urn:hl7-org:v3";

	@Resource
	private WebServiceContext context;

	@WebMethod(operationName = "PDQSupplier_PRPA_IN201305UV02", action = "urn:hl7-org:v3:PRPA_IN201305UV02")
	@WebResult(name = "PRPA_IN201306UV02", partName = "Body", targetNamespace = HL7_NS)
	@Action(input = "urn:hl7-org:v3:PRPA_IN201305UV02", output = "urn:hl7-org:v3:PRPA_IN201306UV02")
	public PRPAIN201306UV02Type findCandidatesQuery(
			@WebParam(name = "PRPA_IN201305UV02", partName = "Body", targetNamespace = HL7_NS) PRPAIN201305UV02Type request){
		PDQV3QueryHandler queryHandler = new PDQV3QueryHandler(getDomainForPDQ(),
				Actor.findActorWithKeyword("PDS"), Actor.findActorWithKeyword("PDC"),
				Transaction.GetTransactionByKeyword("ITI-47"), getRemoteHostFromContext());
		try {
			return queryHandler.handlePRPAIN201305UV02(request);
		} catch (Exception e) {
			log.error(e.getMessage(), e);
			return null;
		}
	}
}
Service, Port and binding
| Java code | WSDL | Value in the example |
| serviceName attribute of @Webservice |
definitions@name service@name |
PDQSupplier_Service |
| targetNamespace attribute of @Webservice | definitions@targetNamespace | urn:ihe:iti:pdqv3:2007 (prefixed as ns1 in the generated wsdl) |
| name attribute of @Webservice |
portType@name bindings@type |
PDQSupplier_PortType |
| portName attribute of @Webservice | service/port@name | PDQSupplier_Port_Soap12 |
You can use the RespectBindingFeature to control whether a JAX-WS implementation is required to respect the contents of a Web Services Description Language (WSDL) binding that is associated with an endpoint. In that case, use annotation @RespectBinding(enabled="true")
Messages
| Java code | WSDL | Value in example |
|
name attribute of @WebResult name attribute of @WebParam |
message/part@element | PRPA_IN201305UV02 |
|
partName attribute of @WebResult partName attribute of @WebParam |
message/part@name | body (default) |
|
targetNamespace attribute of @WebResult targetNamespace attribute of @WebParam |
used as namespace in message/part@element | urn:hl7-org:v3 |
You can also use header attribute of @WebParam if the parameter is expected in the header of the SOAP envelop.
Note: ns1 is the namespace prefix for urn:hl7-org:v3
<wsdl:message name="PDQSupplier_QUQI_IN000003UV01_ContinueResponse">
<wsdl:part element="ns1:PRPA_IN201306UV02" name="body"></wsdl:part>
</wsdl:message>
<wsdl:message name="PDQSupplier_QUQI_IN000003UV01_Continue">
<wsdl:part element="ns1:QUQI_IN000003UV01" name="body"></wsdl:part>
</wsdl:message>
<wsdl:message name="PDQSupplier_QUQI_IN000003UV01_CancelResponse">
<wsdl:part element="ns1:MCCI_IN000002UV01" name="body"></wsdl:part>
</wsdl:message>
<wsdl:message name="PDQSupplier_PRPA_IN201305UV02">
<wsdl:part element="ns1:PRPA_IN201305UV02" name="Body"></wsdl:part>
</wsdl:message>
<wsdl:message name="PDQSupplier_QUQI_IN000003UV01_Cancel">
<wsdl:part element="ns1:QUQI_IN000003UV01_Cancel" name="body"></wsdl:part>
</wsdl:message>
<wsdl:message name="PDQSupplier_PRPA_IN201305UV02Response">
<wsdl:part element="ns1:PRPA_IN201306UV02" name="Body"></wsdl:part>
</wsdl:message>
Operations and bindings
Typically, you will need to create one method per operation.
| Java code | WSDL | Value in example |
| operationName attribute of @WebMethod |
portType/operation@name binding/operation@name |
PDQSupplier_PRPA_IN201305UV02 |
| action attribute of @WebMethod |
binding/operation/operation@soapAction |
urn:hl7-org:v3:PRPA_IN201305UV02 |
| input attribute of @Action |
portType/operation/input@wsam:Action
portType/operation/input@wsaw:Action |
urn:hl7-org:v3:PRPA_IN201305UV02 |
| output attribute of @Action |
portType/operation/output@wsam:Action portType/operation/output@wsaw:Action |
urn:hl7-org:v3:PRPA_IN201306UV02 |
<wsdl:portType name="PDQSupplier_PortType">
<wsdl:operation name="PDQSupplier_QUQI_IN000003UV01_Continue">
<wsdl:input message="tns:PDQSupplier_QUQI_IN000003UV01_Continue" name="PDQSupplier_QUQI_IN000003UV01_Continue" wsam:Action="urn:hl7-org:v3:QUQI_IN000003UV01_Continue" wsaw:Action="urn:hl7-org:v3:QUQI_IN000003UV01_Continue"></wsdl:input>
<wsdl:output message="tns:PDQSupplier_QUQI_IN000003UV01_ContinueResponse" name="PDQSupplier_QUQI_IN000003UV01_ContinueResponse" wsam:Action="urn:hl7-org:v3:PRPA_IN201306UV02" wsaw:Action="urn:hl7-org:v3:PRPA_IN201306UV02"></wsdl:output>
</wsdl:operation>
<wsdl:operation name="PDQSupplier_PRPA_IN201305UV02">
<wsdl:input message="tns:PDQSupplier_PRPA_IN201305UV02" name="PDQSupplier_PRPA_IN201305UV02" wsam:Action="urn:hl7-org:v3:PRPA_IN201305UV02" wsaw:Action="urn:hl7-org:v3:PRPA_IN201305UV02"></wsdl:input>
<wsdl:output message="tns:PDQSupplier_PRPA_IN201305UV02Response" name="PDQSupplier_PRPA_IN201305UV02Response" wsam:Action="urn:hl7-org:v3:PRPA_IN201306UV02" wsaw:Action="urn:hl7-org:v3:PRPA_IN201306UV02"></wsdl:output>
</wsdl:operation>
<wsdl:operation name="PDQSupplier_QUQI_IN000003UV01_Cancel">
<wsdl:input message="tns:PDQSupplier_QUQI_IN000003UV01_Cancel" name="PDQSupplier_QUQI_IN000003UV01_Cancel" wsam:Action="urn:hl7-org:v3:QUQI_IN000003UV01_Cancel" wsaw:Action="urn:hl7-org:v3:QUQI_IN000003UV01_Cancel"></wsdl:input>
<wsdl:output message="tns:PDQSupplier_QUQI_IN000003UV01_CancelResponse" name="PDQSupplier_QUQI_IN000003UV01_CancelResponse" wsam:Action="urn:hl7-org:v3:MCCI_IN000002UV01" wsaw:Action="urn:hl7-org:v3:MCCI_IN000002UV01"></wsdl:output>
</wsdl:operation>
</wsdl:portType>
Addressing
If the addressing tag can be present in the inbound message, add the @Addressing annotation and set its enabled attribute to "true".
If mustUnderstand="true" is expected, set the required attribute to "true".
Handlers
In our example, we use the @HandlerChain annotation the one references an XML file. In the Java project, this file is located in EJBModule resources: resources/net/ihe/gazelle/simulator/pdqv3/pds/soap-hander.xml. It is import that the folder hierarchy matches the package where the Java class is defined (here net.ihe.gazelle.simulator.pdqv3.pds).
Below is its content:
<?xml version="1.0" encoding="UTF-8" standalone="yes"?>
<javaee:handler-chains
		xmlns:javaee="http://java.sun.com/xml/ns/javaee">
	<javaee:handler-chain>
		<javaee:handler>
			<javaee:handler-class>net.ihe.gazelle.simulator.common.ihewsresp.WSAddressingHandler</javaee:handler-class>
		</javaee:handler>
	</javaee:handler-chain>
</javaee:handler-chains>
The WSAddressingHandler class referenced here is used to explicit the content of the addressing element in the SOAP header. This is required when you force the addressing using @Addressing(enabled="true", required="true").
Faults
You can define SOAP faults that will be returned by your webservice in specific use cases.
Add the following in the @Action annotation (example):
fault = {
			@FaultAction(className = NAVFault.class, value = "NAV"),
			@FaultAction(className = VERUNKFault.class, value = "VERUNK") }
You can declare as many @FaultAction as you need. The classes returned for those faults (NAVFault and VERUNKFault in our case) shall
- be thrown by your web method
- extend SoapFaultException
Below, as example, is the implementation of the NAVFault Class.
@WebFault(name = "NAV", targetNamespace = "urn:ihe:iti:svs:2008")
	public class NAVFault extends SOAPFaultException {

		/**
		 *
		 */
		private static final long serialVersionUID = 1L;

		public NAVFault(SOAPFault fault) {
			super(fault);
			try {
				getFault().setFaultCode(new QName("http://www.w3.org/2003/05/soap-envelope", "Sender"));
				getFault().appendFaultSubcode(new QName(SVS_NS, "NAV"));
				getFault().addFaultReasonText("Unknown value set", Locale.ENGLISH);
			} catch (SOAPException e) {
				log.error("Unable to build NAV SOAPFault");
				e.getMessage();
			}
		}
	}
| Java code | WSDL | Value in example |
|
value attribute of @FaultAction name attribyte of @WebFault |
portType/operation/fault@Action | NAV |
| className attribute of @FaultAction | portType/operation/fault@name | NAVFault |
| targetNamespace attribute of @WebFault | used as namespace in message/part/element | urn:ihe:iti:svs:2008 |
Handler chains
In the same way as we use an handler to make the addressing header understandable by Jboss, we can define other handlers for operations to be performed
- before processing of the request by the @WebService class
- after generation of the response by the @WebService class (and thus before sending to the requester)
It allows you to perform some operations on the entire SOAP message.
Once your handler is ready, you can declare it in the handler.xml file. You can add as many <java:handlier-chain> elements as you need.
The easier way is to
- extend the SOAPRequestHandler class (from org.jboss.seam.webservice) if you want the operations to be applied only on requests
- implement the SOAPHandler<SOAPMessageContext> interface for operations to be applied on requests and responses
The handle{Message|Fault|Inbound|Outbound} methods return a boolean indicating if the message shall be processed by the @WebService class. If the message shall not be processed and you want to send a Fault to the end user, simply throw a RuntimeException, its message will be used as fault reason in the returned response.
Examples:
- Implementation of SOAPHander<SOAPMessageContext> interface: WSAddressingHandler
- Extension of SOAPRequestHandler class: XServiceProvider
Jboss 5.1.0 Configuration
In order to make sure that the wsdl is correct and displays a URL in soap12:address/@location which is correct and reachable by the requester, the following changes shall be brought to the configuration (to be performed on each server inside a jboss installation):
In file ${JBOSS_HOME}/server/${JBOSS_SERVER}/deployers/jbossws.deployer/META-INF/stack-agnostic-jboss-beans.xml, replace
<property name="webServiceHost">${jboss.bind.address}</property>
by the following
<property name="webServiceHost">jbossws.undefined.host</property>
And make sure that the modifySOAPAddress property is set to true:
<property name="modifySOAPAddress">true</property>
You must restart your Jboss server to take the changes into account.
jboss 7.X Configuration
In order to make sure that the wsdl is correct and displays a URL in soap12:address/@location which is correct and reachable by the requester, the following changes shall be brought to the configuration (to be performed on each server inside a jboss installation):
In file standalone.xml of the jboss that you are running (file located at configuration/standalone.xml)
<wsdl-host>${jboss.bind.address}:0.0.0.0</wsdl-host>
by the following
<wsdl-host>jbossws.undefined.host</wsdl-host>
And make sure that the following property is set to true:
<modify-wsdl-address>true</modify-wsdl-address>
You must restart your Jboss server to take the changes into account.
Testing webservice integration with soapUI in Jenkins (Automated)
Configure the Maven project
The SoapUI project must be added in the code source of the tested program in /src/main/resources/soapui in the ear.
The maven plugin for SoapUI must be added to the pom.xml of the ear. First add the plugin repository :
<pluginRepositories>
    <pluginRepository>
        <id>smartbear-sweden-plugin-repository</id>
        <url>http://www.soapui.org/repository/maven2/</url>
    </pluginRepository>
</pluginRepositories>
Then add the plugin :
You need to change projectFile (with the path of your soap ui project file) and Id (in Execution; with the name of the service).
<plugin>
    <groupId>com.smartbear.soapui</groupId>
    <artifactId>soapui-maven-plugin</artifactId>
    <version>${version.soapui}</version>
    <configuration>
        <projectFile>${project.basedir}/src/main/resources/soapui/DemographicDataServer-soapui-project.xml</projectFile>
        <outputFolder>target/surefire-reports</outputFolder>
        <junitReport>true</junitReport>
        <printReport>true</printReport>
        <exportAll>true</exportAll>
        <testFailIgnore>true</testFailIgnore>
        <endpoint>${endpoint}</endpoint>
    </configuration>
    <executions>
        <execution>
            <id>DemographicDataServer</id>
            <phase>test</phase>
            <goals>
                <goal>test</goal>
            </goals>
        </execution>
    </executions>
    <dependencies>
        <dependency>
            <groupId>com.smartbear.soapui</groupId>
            <artifactId>soapui</artifactId>
            <version>${version.soapui}</version>
            <exclusions>
                <exclusion>
                    <groupId>javafx</groupId>
                    <artifactId>jfxrt</artifactId>
                </exclusion>
            </exclusions>
        </dependency>
    </dependencies>
</plugin>
Don’t forget to add the property for version.soapui :
<properties>
    <version.soapui>5.3.0</version.soapui>
</properties>
Starting 5.0.0, the plugin use javafx and it can cause an error at the execution. To solve this, I exclude javafx from the dependencies because it is not needed in most cases. If you need it you can switch back to 4.6.4 or try to find a better solution.
You can find the full documentation (including the list of plugin settings and versions of the plugin) on the soapui website : https://www.soapui.org/test-automation/maven/maven-2-x.html
Create a Job in Jenkins
Create a new maven project.
Tick “This project is parameterized” and add a Parameter (I chose Extensible Choice). Name it “endpoint” and select “Textarea Choice Parameter” in “Choice Provider”. In “Choices” put the url of the wsdl that need to be tested. You can add as much as you want.
In Source Code Management tick Subversion and indicate the url of the project from the repository (in my case I put the url of the trunk).
The last thing to do is to configure the build.
You must indicate the path of the pom of the ear (The one where you add the plugin) and not the project one.
In “Goal and options” put : clean com.smartbear.soapui:soapui-maven-plugin:5.3.0:test
Change 5.3.0 if you use an other version.
Transfer proxmox vm
Export the VM file
The VM must be prepared for export and compression. On the running VM, fill out the disk with 0s.
dd if=/dev/zero of=/mytempfile
rm -f /mytempfile
And stop the VM afterwards
Then, Compress the VM. Note somewhere the uncompressed VM size, this will be required for the import. On the proxmox server, run the following command in the folder where the image is located. You need to replace the 127 with the id of the VM, and the 1 with the id of the disk
qemu-img convert -p -O qcow2 -c vm-127-disk-1.qcow2 vm-127-disk-1-compressed.qcow2
When this is finished transfer the compressed file where needed.
Import the VM file (LVM storage)
On the targeted proxmox, create a new VM with at least equivalent storage space. In the next steps we will write the previoulsy exported disk in this new image. Do not start it.
Then, uncompress the VM on a storage with enough space. If you do not know the uncompressed size, multiply the compressed size by 6 at least.
qemu-img convert -p -O raw vm-127-disk-1-compressed.qcow2 vm-127-disk-1.raw
Finally, copy the disk. Note that the VM and disk ids might be different for the new VM
dd if=vm-127-disk-1.raw of=/dev/pve/vm-999-disk-5.raw
Testing webservice integration with soapUI
A good way to test the server side of the web services deployed by our applications is to use soapUI tool. Do not have soapUI installed yet in your development environment ? Start here.
Create your soapUI project
To create a new soapUI project, you only have to enter the URL of the wsdl file of the web service you want to test. Sample requests will be created based on the methods exposed by the endpoint. You may want to customize those requests in order to provide users of your webservices with examples.
Create your test project
Once you have created your project and configured some sample requests, you can create your test suites. If you want to, you can ask soapUI to create the test cases based on the sample requests you have previously configured. Once it's done, you also have the ability to add assertions to each test cases. This is very useful when your run tests otherwise the outcome of your test might often be "unknown". For an example, take a look at the attached file, you only have to open it in soapUI to get its content.
Not that those tests are useful to test the server part of your webservice. You might also write tests for the client side to ensure that the response sent by the server is still understandable and parsable from the point of view of the client.
Configure properties
To use the Gazelle plugin dedicated to the execution of soapUI tests, you need to define a custom property named ServiceEndpoint, follow the instructions available in this tutorial to do so.
Use Gazelle plugin
soapui-tests gazelle plugin is available from gazelle-plugins:1.46, gazelle-seam:1.222 and gazelle-tools:2.131. Commonly, you will want to update the version of your parent pom, that's mean gazelle-tools.
The plugin is configured to be executed during test phase. That means that if the plugin is configured in your project, it will be executed each time the test phase is run. The plugin requires the following input parameters:
- testConfigurations is a list of testConfiguration elements
where testConfiguration is made of the following attributes:
- serviceEndpoint (optional) targets the endpoint to be queried by soapUI tests (eg. 127.0.0.1:8080)
- one of the following parameters (only one of them can be specified at the same time)
- soapUIProjects which is a list of soapui project files to be executed
- soapUIProjectDirectory which is the path to the directory which contains the XML files representing the soapui projects to be executed.
See below an example of configuration
<plugin>
	<groupId>org.codehaus.mojo</groupId>
	<artifactId>gazelle-plugins</artifactId>
        <configuration>
	<testConfigurations>
		<testConfiguration>
			<serviceEndpoint>127.0.0.1:8080</serviceEndpoint>
			<!-- <soapUIProjects>
				<param>/home/aberge/workspace/webservice-test-runner/src/main/resources/soapui-projects/GazelleHL7v2Validator-soapui-project.xml</param>
			</soapUIProjects> -->
			<soapUIProjectDirectory>/home/aberge/workspace/webservice-test-runner/src/main/resources/soapui-projects</soapUIProjectDirectory>
		</testConfiguration>
	</testConfigurations>
	</configuration>
	<executions>
		<execution>
			<phase>test</phase>
			<goals>
				<goal>soapui-tests</goal>
			</goals>
		</execution>
	</executions>
</plugin>
When you execute maven, the plugin will be automatically executing at test phase and you will get the logs within the terminal output
You can also choose to execute only the plugin:
- Go to the module in which the plugin is defined
- execute
mvn gazelle:soapui-tests
Minifying assets
Definitions
- assets = resources css, javascript.
- minify = remove every character that takes space without providing function.
- concat = well you know concatenation, create on file containing all your css, one file with all your javascript.
What is it?
It reduces the size of the css and javascript, by minfying and concatenating them.Minification refers to the process of removing unnecessary or redundant data without affecting how the resource is processed by the browser - e.g. code comments and formatting, removing unused code, using shorter variable and function names, and so on.
Why?
Because, 10 css and 13 javascripts (1 from google) for TM, it takes time!Your browser is limited to 6 tcp connections at the same time, to the same domain.
That's why your connections are stalled, they are waiting for already established connection to become available.
If you can reduce the number of css and javascript to load you reduce the page load time and your user will be happy.
Because we are using jboss-seam some css and js are injected by the framework at compile time, so we can't minfy them (I'll try to copy them in the project to test).
When using minification the number of request is reduced: 6css and 5 javascript (1 from google) total of 11 requests instead of 23 to load css and javascript.
The browser loads images earlier than before.
Before minification
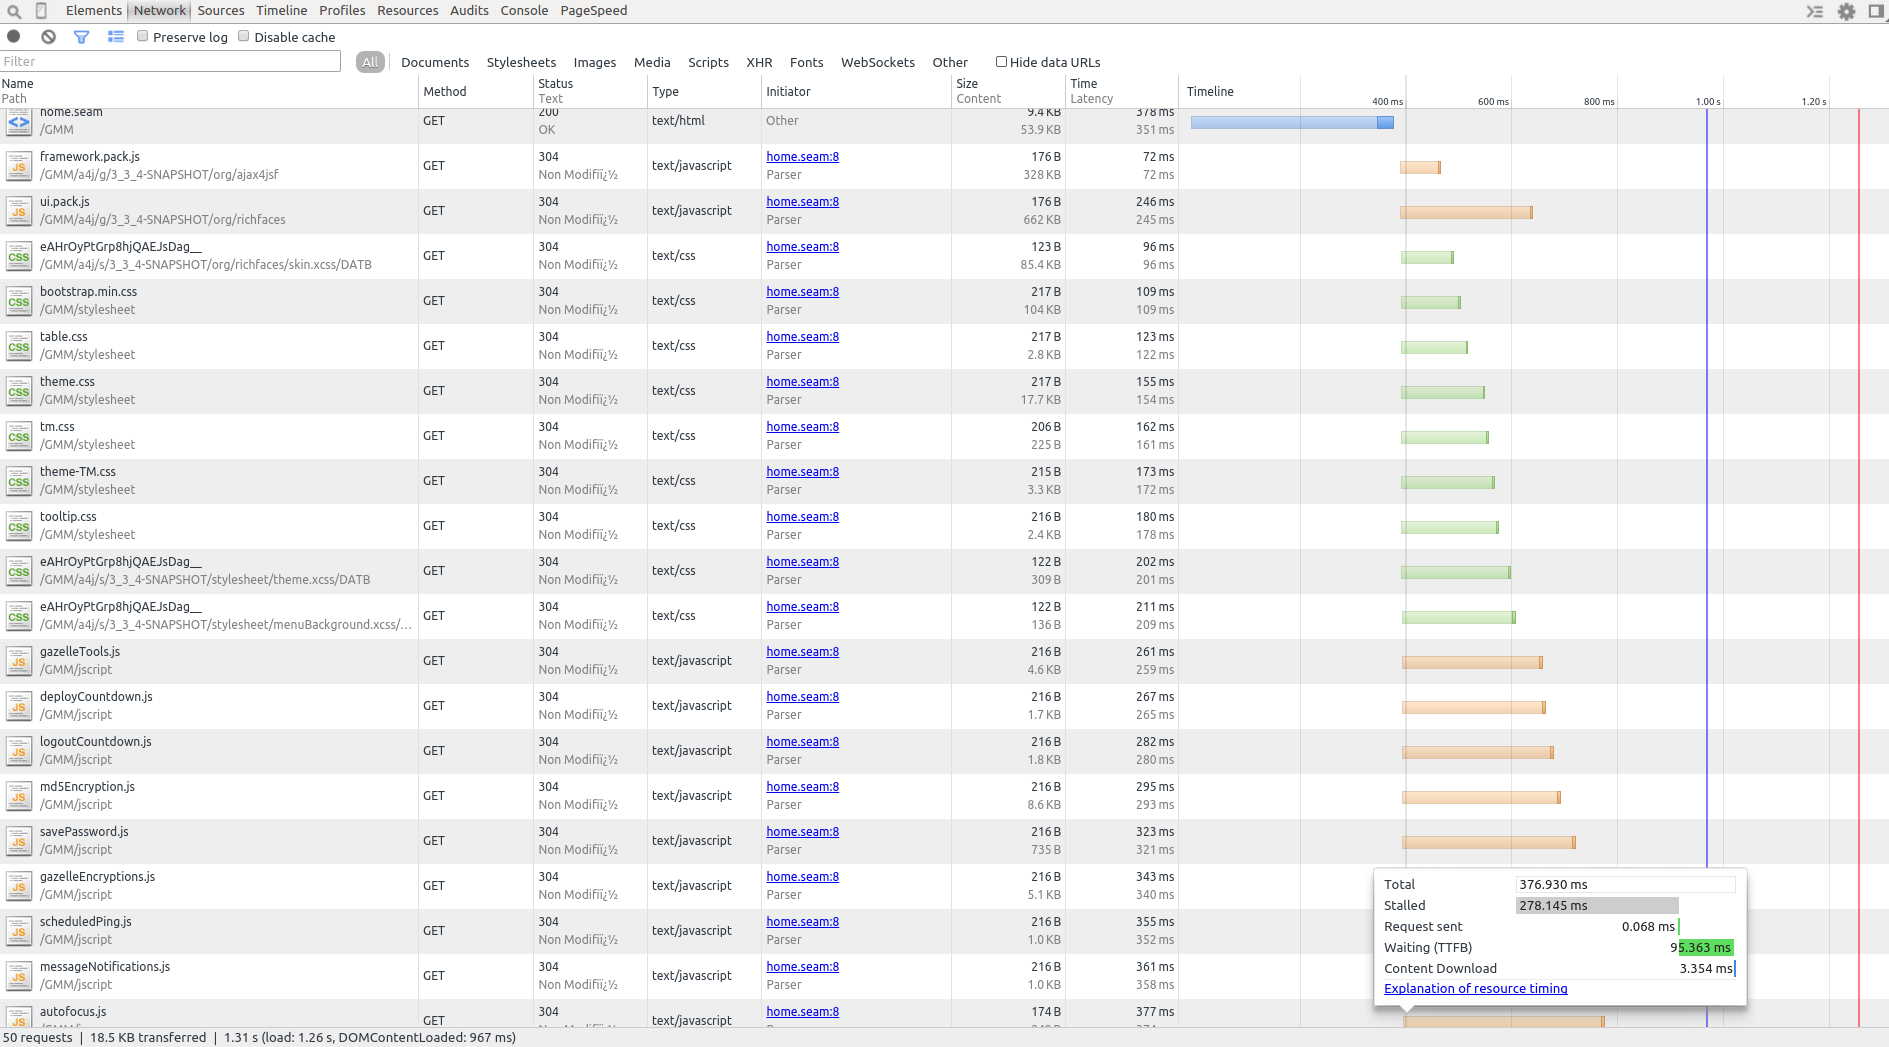
After minification
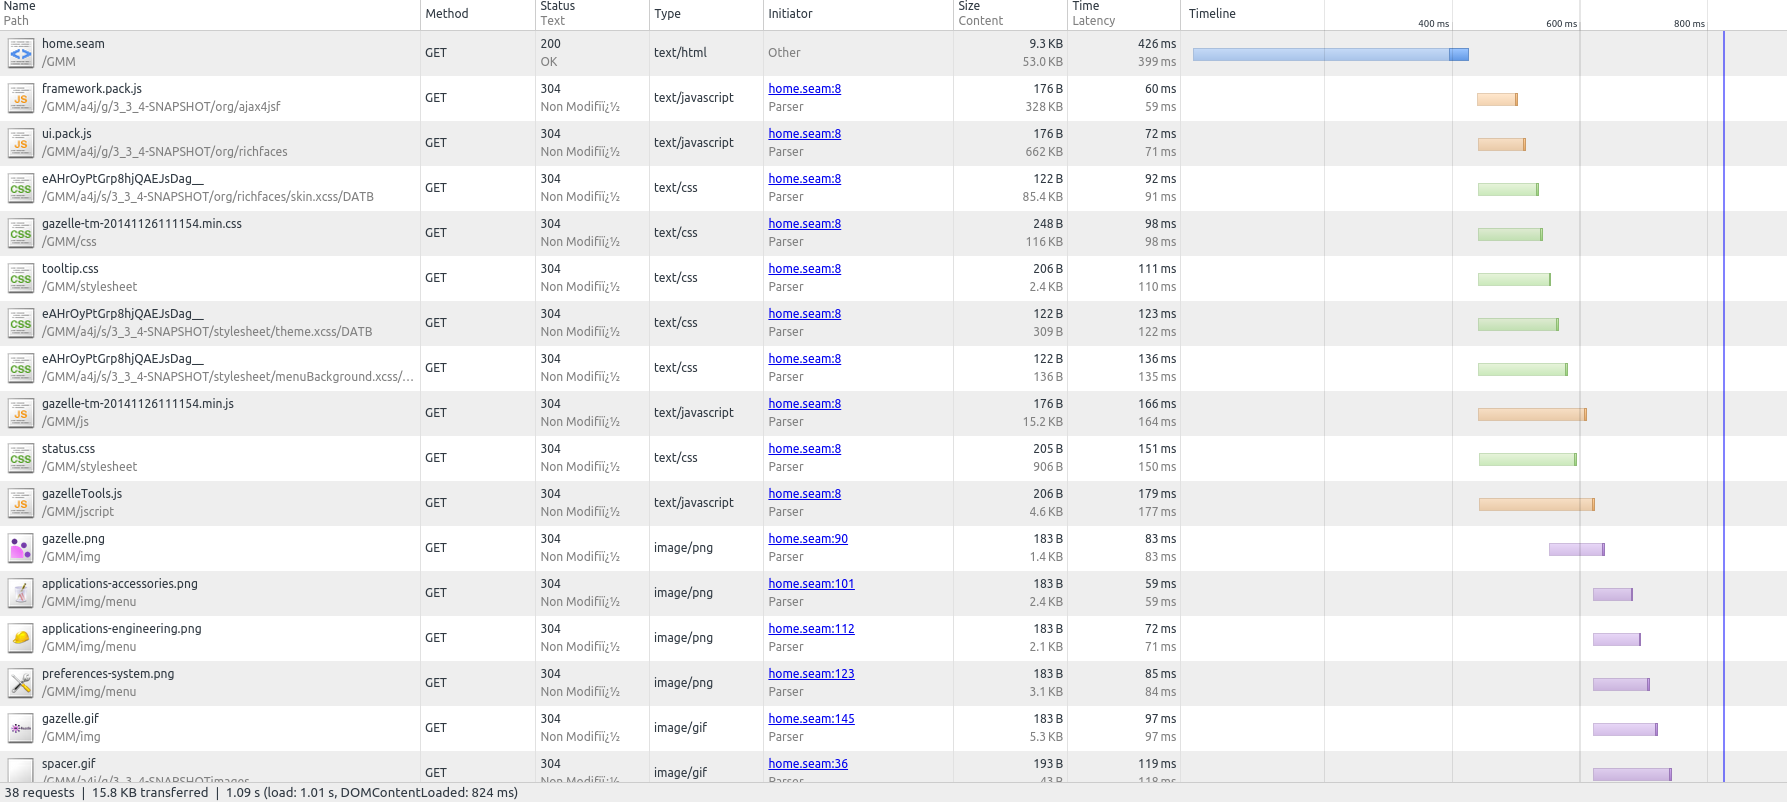
How does it work?
- You develop using multiple css and javascript to ease maintainability.
- You ask maven to concat an minify your assets.
- It generates 2 files, one css and one javascript.
- Files name contains timestamps, allowing us to use cache on user browser and on server side without worrying about cache invalidation.
- You include only the 2 generated files in your template.xhtml.
How can I do that?
Since gazelle-seam 1.124 you can use the minify-maven-plugin in your projectsupdate your projects to reference gazelle-seam 2.0.9 or higher.
Conventions
We will follow those conventions:
- Assets are stored in war
- css goes into: src/main/webapp/resources/stylesheet
- javascript goes into: src/main/resources/jscript
So your target includes the resources/stylesheet and resources/javascript of war you depends on. Then you can minfy them.
If they are in a jar, you can't minify them.
War Pom.xml
Edit your project war pom.xmlAdd dependencies
Add dependencies to needed war for example in gazelle-tm-war/pom.xml<dependency>
<groupId>net.ihe.gazelle.maven</groupId>
<artifactId>gazelle-seam-tools-war</artifactId>
<type>war</type>
</dependency>
Configure minification
add property used to timestamp minified assets files<properties>
<maven.build.timestamp.format>yyyyMMddHHmmss</maven.build.timestamp.format>
<gazelle-assets-version>${maven.build.timestamp}</gazelle-assets-version>
....
</properties>
with maven-war-plugin call exploded goal while prepare-package phase to ensure all assets from dependencies are in the target folder.
<plugin>
<groupId>org.apache.maven.plugins</groupId>
<artifactId>maven-war-plugin</artifactId>
<executions>
<execution>
<phase>prepare-package</phase>
<goals>
<goal>exploded</goal>
</goals>
</execution>
</executions>
....
</plugin>
Configure minify-maven-plugin
<plugin>
<groupId>com.samaxes.maven</groupId>
<artifactId>minify-maven-plugin</artifactId>
<executions>
<execution>
<id>default-minify</id>
<phase>prepare-package</phase>
<configuration>
<charset>UTF-8</charset>
<cssSourceDir>resources/stylesheet</cssSourceDir>
<webappSourceDir>${project.build.directory}/${artifactId}-${version}</webappSourceDir>
<cssSourceFiles>
<cssSourceFile>file-1.css</cssSourceFile>
...
<cssSourceFile>file-n.css</cssSourceFile>
</cssSourceFiles>
<cssFinalFile>rename_your_assets_file-${gazelle-assets-version}.css</cssFinalFile>
<jsSourceDir>resources/jscript</jsSourceDir>
<jsSourceFiles>
<jsSourceFile>file-1.js</jsSourceFile>
....
<jsSourceFile>file-n.js</jsSourceFile>
</jsSourceFiles>
<jsFinalFile>rename_your_assets_file-${gazelle-assets-version}.js</jsFinalFile>
<jsEngine>CLOSURE</jsEngine>
</configuration>
<goals>
<goal>minify</goal>
</goals>
</execution>
</executions>
</plugin>
Update your template.xhtml
remove old css and javascript references
add references to minified css and javasript
<h:ouputStylesheet library="stylesheet" name="rename_your_assets_file-${gazelle-assets-version}.min.css" />
Load other css that cannot be minified
Then load javascripts
<h:outputScript library="jscript" name="rename_your_assets_file-${gazelle-assets-version}.min.js" />
What changed in Gazelle folders
Introducing gazelle-assets svn link
It's a war holding some assets, that could be shared by gazelle projects.
it has the following structure:
└── src
└── main
├── resources
└── webapp
├── img
├── resources
├── jscript
├── stylesheet
If your project uses it as a war dependency it will inherit its files.
Unit tests for validator (design and run them from GUI)
In the context of the Gazelle X Validator project, we thought about designing and running the unit tests for rules from the GUI. That means that the user who will create its validators and rules using the tool will also be able to design the associate test cases.
In order to use this approach in some other tools (for instance of the validation of Audit messages), we decided to externalize the common part of this feature in a new module called gazelle-validator-unit-testing.
Sources
https://scm.gforge.inria.fr/svn/gazelle/Maven/gazelle-validator-unit-testing/trunk
Jenkins' Job
http://gazelle.ihe.net/jenkins/job/gazelle-validator-unit-testing/
Jira project
http://gazelle.ihe.net/jira/browse/VUT
Maven metadata
<dependency>
  <groupId>net.ihe.gazelle</groupId>
  <artifactId>gazelle-validator-unit-testing-ejb</artifactId>
  <version>1.0.0-SNAPSHOT</version>
  <type>ejb</type>
</dependency>
<dependency>
  <groupId>net.ihe.gazelle</groupId>
  <artifactId>gazelle-validator-unit-testing-war</artifactId>
  <version>1.0.0-SNAPSHOT</version>
  <type>war</type>
</dependency>
Module content
This module has been designed to create and run unit tests cases. Basically, the need is to check the correctness of a validator designed thanks to a Graphical User Interface without writing Java code.
An abstract unit test case is not linked to any object. You will have to extends this class to link the test cases to the entity you want to check. Then, each test case is defined by
- a keyword
- an expected result
- a list of files to use as inputs (those files are stored on the file system and referenced in the database - see UnitTestFile entity)
- the tested entity

The result of each run is stored in database using the UnitTestLog entity which contains the following attributes (extract):
- run test cases
- used files
- tested version of the entity
- effective result
- timestamp
- reason for failure

How to use it
Configure your project
In the dependency of your project, add references to the EJB and WAR modules of the gazelle-validator-unit-testing project (see Maven metadata above). Then in the pom.xml file of the EAR module add (in the section dedicated to the configuration of the maven-ear-plugin):
<ejbModule>
    <groupId>net.ihe.gazelle</groupId>
    <artifactId>gazelle-validator-unit-testing-ejb</artifactId>
    <uri>gazelle-validator-unit-testing-ejb.jar</uri>
</ejbModule>
In EJB/src/main/resources/META-INF/persistence.xml add a reference to the new EJB module
<jar-file>gazelle-validator-unit-testing-ejb.jar</jar-file>
In the pom.xml file of the WAR module, add a dependency to gazelle-validator-unit-testing-war.
Extend UnitTest abstract entity
The UnitTest abstract class defines common attributes shared by the several type of unit tests you might want to define. The SINGLE_TABLE inheritance strategy is used so you need to define a descriminator (@DescriminatorValue) to distinguish the various objects which will be created in the ut_unit_test table.
Below is an example extracted from gazelle-x-validation-ejb module.
@Entity
@DiscriminatorValue("XVAL_RULE_UT")
public class RuleUnitTest extends UnitTest implements Serializable{

	/**
	 *
	 */
	private static final long serialVersionUID = 904725100611305807L;

	@ManyToOne(targetEntity=Rule.class)
	@JoinColumn(name="tested_rule_id")
	private Rule testedRule;


	public RuleUnitTest(){
		super();
	}

	public RuleUnitTest(Rule rule){
		super();
		this.testedRule = rule;
		setKeyword(TEST_PREFIX + rule.getKeyword() + SEPARATOR);
		setLastResult(null);
	}
    // ...
}
If you need extract attributes, feel free to add them in your child class, you will then be able to add them in the GUI.
Graphical User Interface
Currently, three pages are pre-defined:
- Browse unit test cases
- Browse test logs
- Edit unit test cases
Abstract classes for the backend beans and XHTML templates have been defined and are available in the module.
Manage unit tests
A stateless bean is used to perform some operations on unit test. Extends the net.ihe.gazelle.validator.ut.action.UnitTestManager<T extends UnitTest> class to make those operations available in your tool.
Example of use (from gazelle-x-validation-ejb)
@Name("ruleUnitTestManager")
@Scope(ScopeType.STATELESS)
public class RuleUnitTestManager extends UnitTestManager<RuleUnitTest> {

	/**
	 *
	 */
	private static final long serialVersionUID = -3258729114956565360L;

	public void executeAllTests(Rule rule) {
		List<RuleUnitTest> unitTests = RuleUnitTestDAO.instanceWithDefaultEntityManager().getUnitTestsForRule(rule);
		executeList(unitTests);
	}

	public String createNewTest(Rule rule) {
		return XValidationPages.ADMIN_RULE_UNIT_TEST.getSeamLink() + "?rule=" + rule.getKeyword();
	}

	public String displayUnitTest(RuleUnitTest unitTest) {
		return XValidationPages.ADMIN_RULE_UNIT_TEST.getSeamLink() + "?unitTest=" + unitTest.getKeyword();
	}
    //...
}
Browse unit tests
Abstract class: net.ihe.gazelle.validator.ut.action.UnitTestBrowser<T extends UnitTest, Q extends UnitTestAttributes<T>>: for the basic features provided by the template, you only need to implement the abstract methods declared in this class. Use a PAGE scope.
XHTML template: /unittesting/browseUnitTestsTemplate.xhtml
The following parameters are expected:
- managedBean : reference to the bean which extends UnitTestBrowser, eg. #{ruleUnitTestBrowser}
- unitTestManagerBean: reference to the bean which extends UnitTestManager, eg. #{ruleUnitTestManager}
In addition, you can add:
- filters in the search criteria panel : moreFilters (<ui:define name="moreFilters">your components here</ui:define>)
- columns to the table gathering the unit tests: moreColumns
Browse unit test logs
Abstract class: net.ihe.gazelle.validator.ut.action.UnitTestLogBrowser: for the basis features provided by the template, you only need to implement the abstract methods declated in the class. Use a PAGE scope.
XHTML template: /unittesting/unitTestLogsTemplate.xhtml
The following parameters are expected:
- managedBean : reference to the bean which extends UnitTestLogBrowser, eg. #{ruleUnitTestLogBrowser}
- utManagerBean: reference to the bean which extends UnitTestManager, eg. #{ruleUnitTestManager}
In addition, you can add:
- filters in the search criteria panel : moreFilters (<ui:define name="moreFilters">your components here</ui:define>)
- columns to the table gathering the logs: moreColumns
<!DOCTYPE composition PUBLIC "-//W3C//DTD XHTML 1.0 Transitional//EN"
    "http://www.w3.org/TR/xhtml1/DTD/xhtml1-transitional.dtd">
<ui:composition xmlns="http://www.w3.org/1999/xhtml"
	xmlns:s="http://jboss.com/products/seam/taglib"
	xmlns:ui="http://java.sun.com/jsf/facelets"
	xmlns:f="http://java.sun.com/jsf/core"
	xmlns:h="http://java.sun.com/jsf/html"
	xmlns:a4j="http://richfaces.org/a4j"
	xmlns:rich="http://richfaces.org/rich"
	xmlns:g="http://www.ihe.net/gazelle" template="/layout/template.xhtml">

	<ui:param name="pageName" value="Unit test logs" />
	<ui:param name="pageNameUrl"
		value="/xvalidation/testing/ruleUnitTestEditor.seam" />
	<ui:param name="pageNameTitle" value="Unit test logs" />

	<ui:define name="header">
		<a4j:loadStyle src="/stylesheet/unittest-style.css" /> <!--imports specific CSS classes used by the template-->
	</ui:define>

	<ui:define name="body">
		<s:decorate template="/unittesting/unitTestLogsTemplate.xhtml">
			<ui:param name="managedBean" value="#{ruleUnitTestLogBrowser}" />
			<ui:param name="utManagerBean" value="#{ruleUnitTestManager}" />
			<ui:define name="moreFilters">
				<ui:include src="/filter/filterSuggest.xhtml">
					<ui:param name="filterWidth" value="240" />
					<ui:param name="filter" value="#{ruleUnitTestLogBrowser.filter}" />
					<ui:param name="filterId" value="validator" />
					<ui:param name="filterName" value="Tested validator" />
					<ui:param name="filterForm" value="globalDiv" />
				</ui:include>
				<ui:include src="/filter/filterSuggest.xhtml">
					<ui:param name="filterWidth" value="240" />
					<ui:param name="filter" value="#{ruleUnitTestLogBrowser.filter}" />
					<ui:param name="filterId" value="rule" />
					<ui:param name="filterName" value="Tested rule" />
					<ui:param name="filterForm" value="globalDiv" />
				</ui:include>
			</ui:define>
			<ui:define name="moreColumns">
				<rich:column>
					<f:facet name="header">Tested rule</f:facet>
					<g:link value="#{entry.unitTest.testedRule}" />
					<h:outputText value=" (#{entry.testedVersion})" />
				</rich:column>
			</ui:define>
		</s:decorate>
	</ui:define>
</ui:composition>
Create/Edit unit tests
Abstract class: net.ihe.gazelle.validator.ut.action.UnitTestEditorManager <T extends UnitTest>: implements the abstract methods and append the @Create annotation on the init() method. This init method shall be used to retrieve the unit test to edit (if no parameter is given in the URL, instanciate a new unit test). Use a PAGE scope. How files are appended to the test case is to be defined by you.
XHTML template: /unittesting/unitTestEditorTemplate.xhtml
The following parameters are expected:
- managedBean : reference to the bean which extends UnitTestEditorManager, eg. #{ruleUnitTestEditorManager}
- utManagerBean: reference to the bean which extends UnitTestManager, eg. #{ruleUnitTestManager}
In addition, you can add:
- a panel containing information about the object of the unit test : infoOnValidatedObject
- extract components to render the additional attributes of your unit tests: extraUnitTestAttributes
- a panel to create a new input file: newInputCreation
- the button to create a new file: buttonToCreateNewFile
Examples
This module is used in GazelleXValidatorRuleEditor (classes and xhtml files are respectively in gazelle-x-validation-ejb and gazelle-x-validation-war modules).
Extra tips
On the Unit test log browser page, you may want to add filters to search by tested entity. This entity is not an attribute of the UnitTest abstract class, as a consequence, you will have to implement the addPathToCriteria abstract method declared in UnitTestLogBrowser using the HQLSafePathEntityCriterion constructor. An example is given below.
@Override
	protected void addPathToCriteria(HQLCriterionsForFilter<UnitTestLog> criteria) {
		criteria.addCriterion(new HQLSafePathEntityCriterion(Rule.class, "rule", "unitTest.testedRule"));
		criteria.addCriterion(new HQLSafePathEntityCriterion(GazelleCrossValidatorType.class, "validator", "unitTest.testedRule.gazelleCrossValidator"));
	}
This way, two new suggest filters are available with filterId equals to rule and validator.
Web service for validation
Numerous validation services exposed by Gazelle only needs two methods :
- to list the avalaible validators (might be restricted by a distinguisher attribute)
- to perform the validation itself (uses the file to validate and the name of the validator to use)
When those two methods can be the basis of your validation SOAP web service, you can use the new module net.ihe.gazelle:gazelle-validation-ws. It embeds an interface to declre the web service, an abstract implementation of this interface and classes to store statistics about the usage of the tool.
Maven information
<dependency>
    <groupId>net.ihe.gazelle</groupId>
    <artifactId>gazelle-validation-ws</artifactId>
    <version>1.0.0</version>
    <type>jar</type>
</dependency>
Then you can create your web service as follows
@Stateless
@Name("ModelBasedValidationWS")
@WebService(name = "ModelBasedValidationWS", serviceName = "ModelBasedValidationWSService", portName = "ModelBasedValidationWSPort", targetNamespace = "http://ws.mb.validator.gazelle.ihe.net")
public class GazelleHL7v3ValidationWS extends AbstractModelBasedValidation {
   ....
}
Finally, to store the statistics in the database of your application, implement the ValidatorUsageProvider interface and annotate this new class with @MetaInfService(ValidatorUsageProvider.class)