Editing Profile Information
Introduction
Gazelle Master Model (GMM) allows administrators to add new Integration Profile information into Gazelle. This enables vendors to register testing these profiles at a Connectathon. Gazelle must be configured to know about the actors, transactions, and options defined within an Integration Profile. It must know which Domain the Integration Profile belongs to.
Entering IHE Profile information consists of these 6 steps detailed in this documentation:
- Add New Actors
- Add New Transactions
- Link Transactions to Actors
- Add New Options
- Add a New Integration Profile
- Link Actors, Transactions, and Options to the Integration Profile
- Link the Integration Profile to a Domain
Not currently covered in this document, but needed in order for profile entry to be complete:
- Entering profile mandatory groupings (aka profile dependencies) ie Actor A in Profile P must also implement Actor B in profile Q (eg all actors in the XDS.b profile must also implement ATNA Secure Node)
- Entering default configurations for transactions in the profile
- Entering sample definitions
- Entering Roles for test definitions
Add new actors
Gazelle is populated with Actors from Integration Profiles across all IHE domains. Prior to adding a new Actor, search the list of existing Actors to see if it already exists (eg. an Acquisition Modality or a Content Creator actor is used by many IHE Integration Profiles).
- From the main menu, select TF -> Actor Management

- Search for existing Actors. There are several methods you can use:
- You can restrict the search to a specific domain by selecting a value in the Select a Domain list box
- Search by Keyword by typing into the data entry box at the top of the Keyword or Name column. (The search starts as you begin typing; there is no need to press Enter to start the search.)
- You can sort the Keyword or Name columns by clicking on the up and down triangles in the column heading.

- To add a new actor, select the Add an actor button at the top right of the page.
- On the Actor : New screen, enter:
- Keyword - This is a short form of the Actor name; it can be an abbreviation or acronym. Use all upper case letters and underscores. No spaces. (Although gazelle allows you to edit this keyword, once you complete all of your data entry, you should not change this keyword later. The dependency configuration relies on this value to remain the same.)
- Name – This is the full name of the actor from the Technical Framework.
- Description – You can copy the definition for the actor from the Technical Framework. May be left blank.
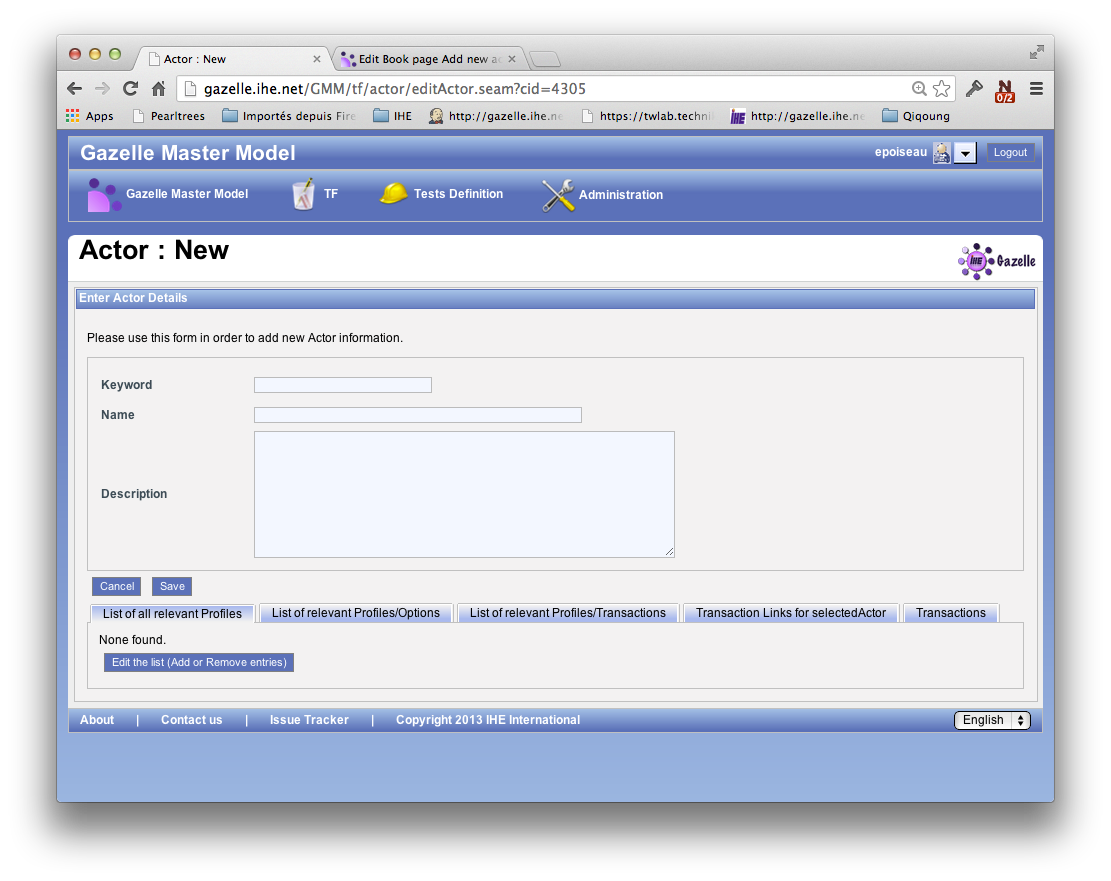
- Select the Save button to finish.
Add new transaction
Transactions, like actors, can be viewed in a list fashion accessed from the TF drop down menu.
- From the main menu, select TF à Transaction Browsing
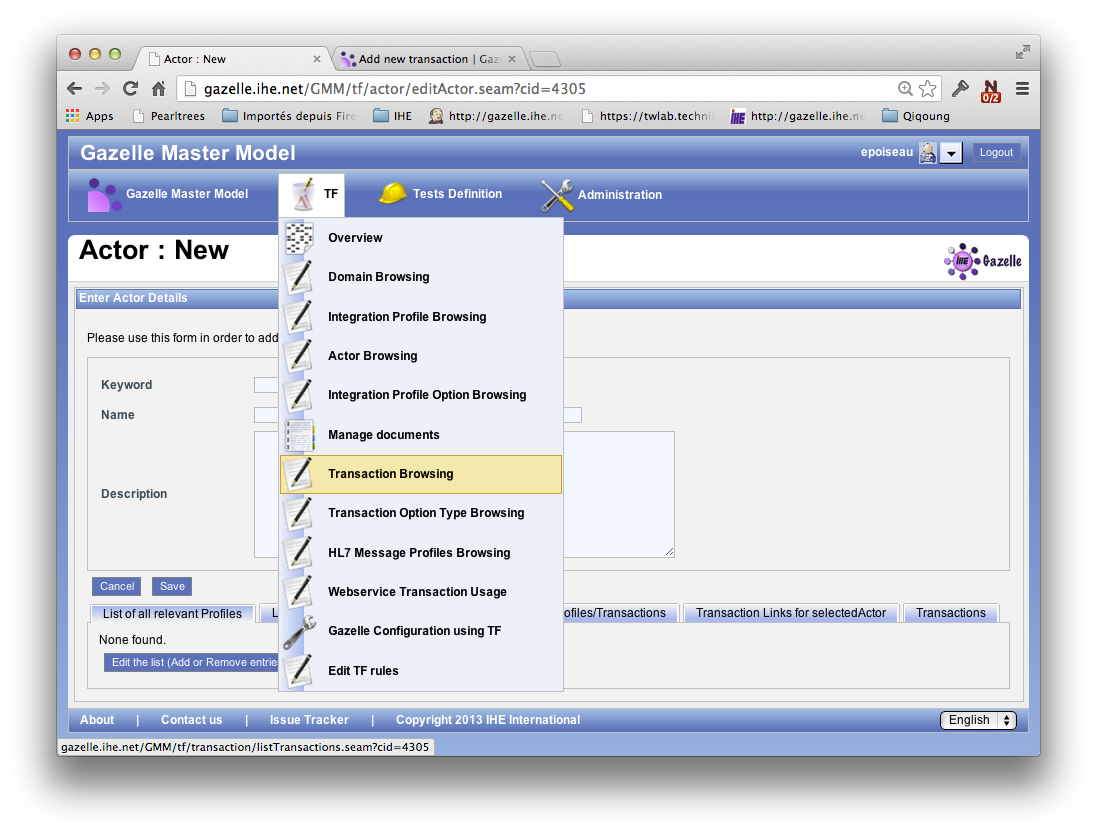
- Search for existing Transactions.
- Search by entering a Keyword. This is the abbreviation of the transaction, eg ITI-2, QRPH-1, RAD-8.
- Sort the list by Keyword or Name and page through the list using the page numbers at the bottom of the screen.
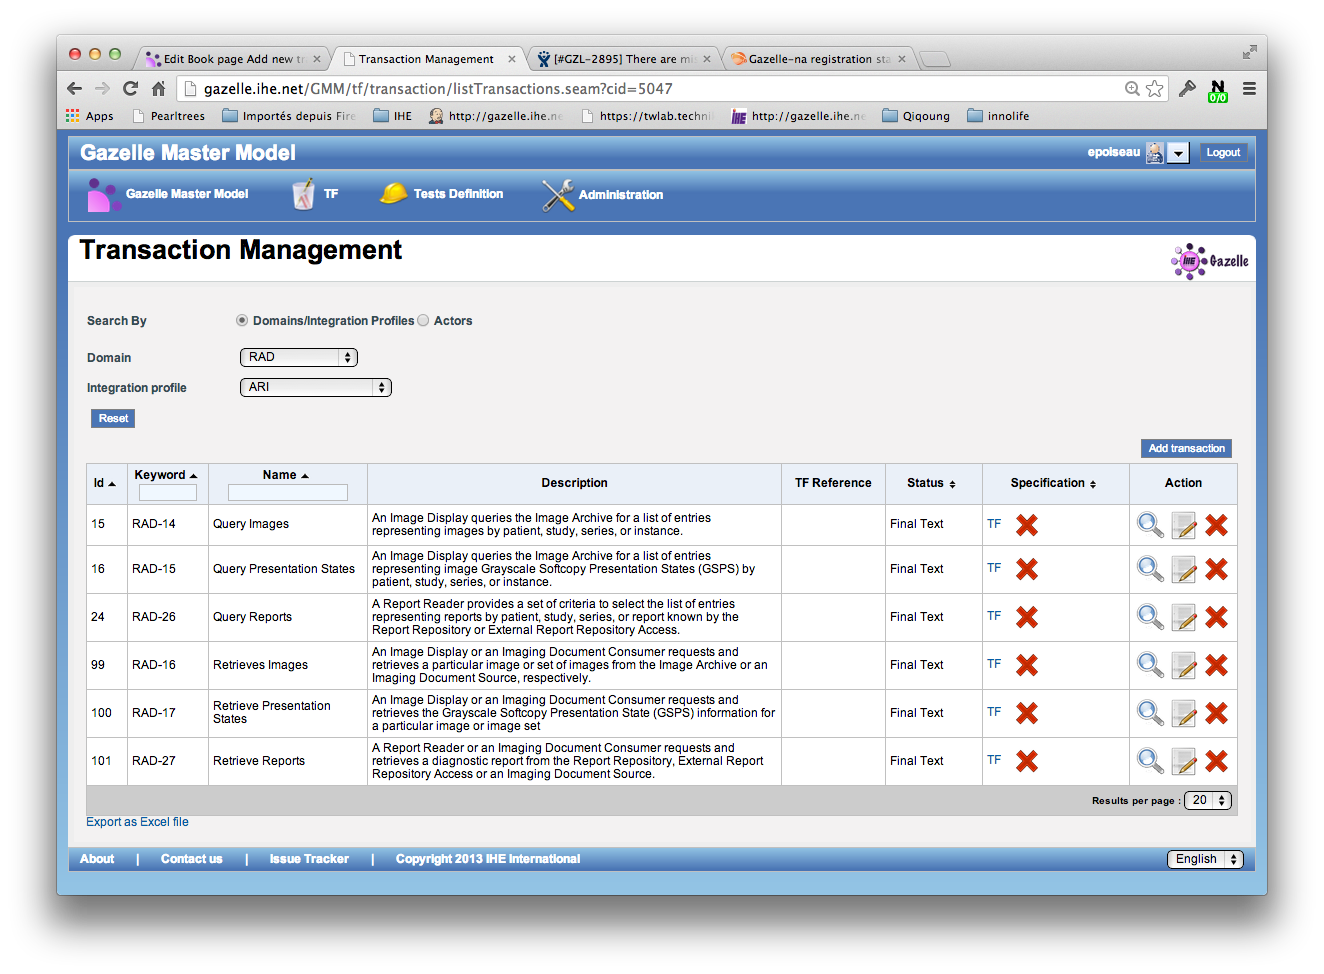
- To add a new transaction, select the Add transaction button at the top right of the page.
- On the following page, enter:
- Keyword – This is a shortened form of the Transaction containing the domain acronym followed by a dash, then a number (no spaces) Example: RAD-4
- Name – This is the full name of the transaction from the Technical Framework.
- Description – You can copy the definition for the transaction from the Technical Framework. May be left blank.
- TF Reference – The reference to the particular volume and section from the Technical Framework. May be left blank.
- Status – All new transactions entered into Gazelle will be entered as Trial Implementations. May also be Final Text.
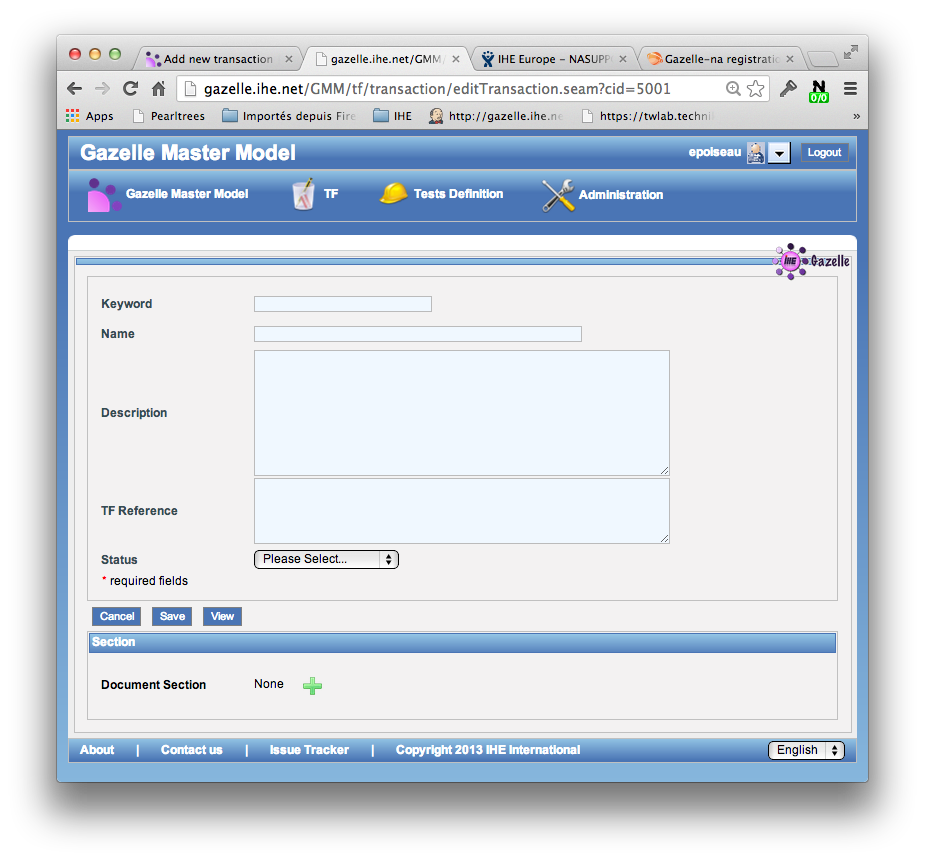
- Click on the Save button to save your changes
Link Transactions to Actors
Transactions occur between actors; one actor is the source and another is the destination. Gazelle is configured to know that a transaction is From an actor To another actor. can be viewed in a list fashion accessed from the TF drop down menu.
- From the main menu, select TF -> Transaction Management
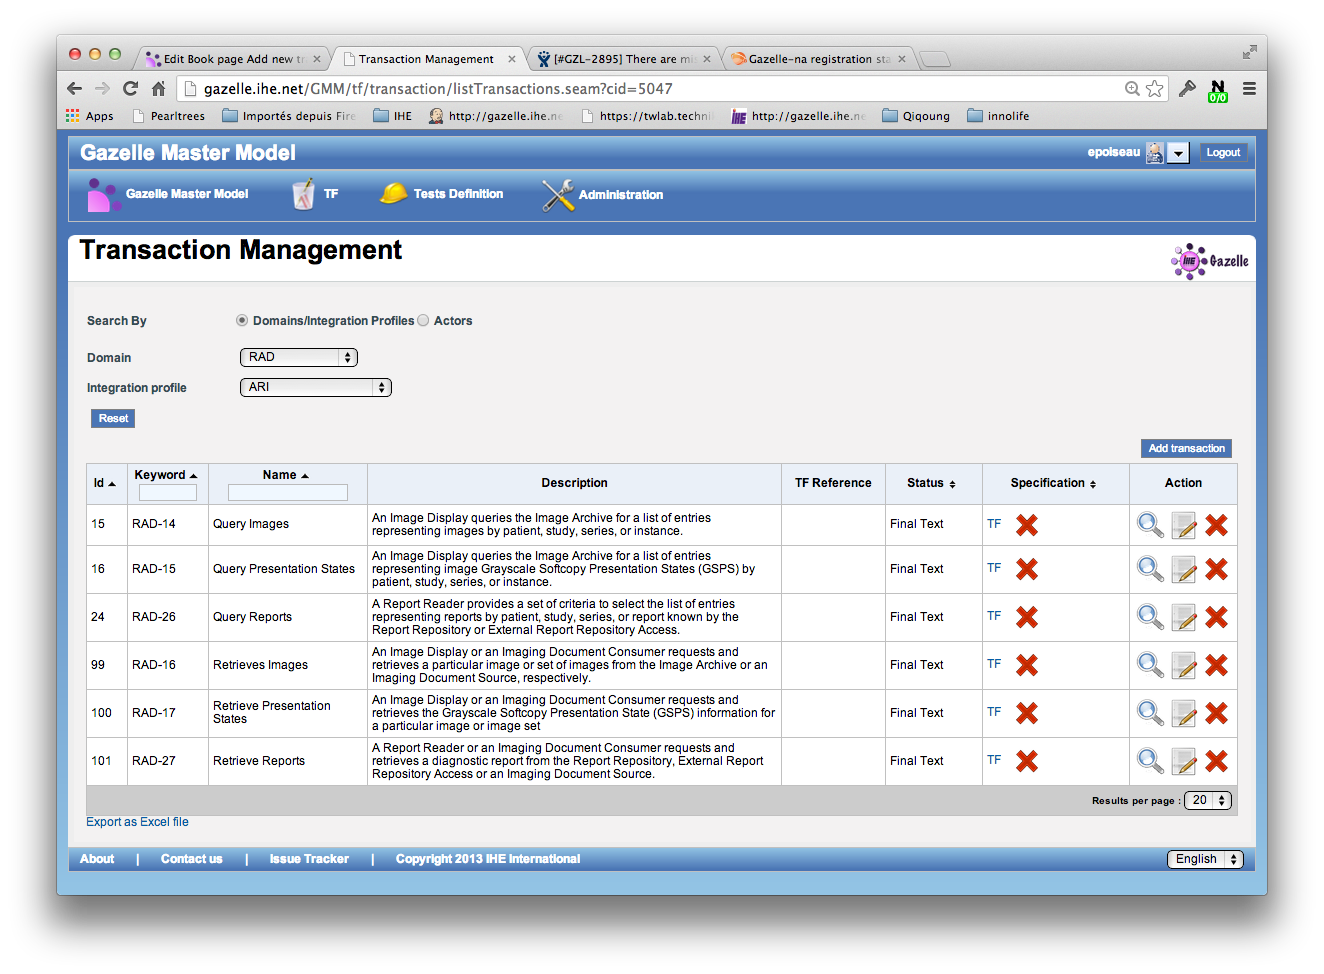
- Search for existing Transactions. Search by entering a Keyword. This is the abbreviation of the transaction, eg ITI-2, QRPH-1, RAD-8.
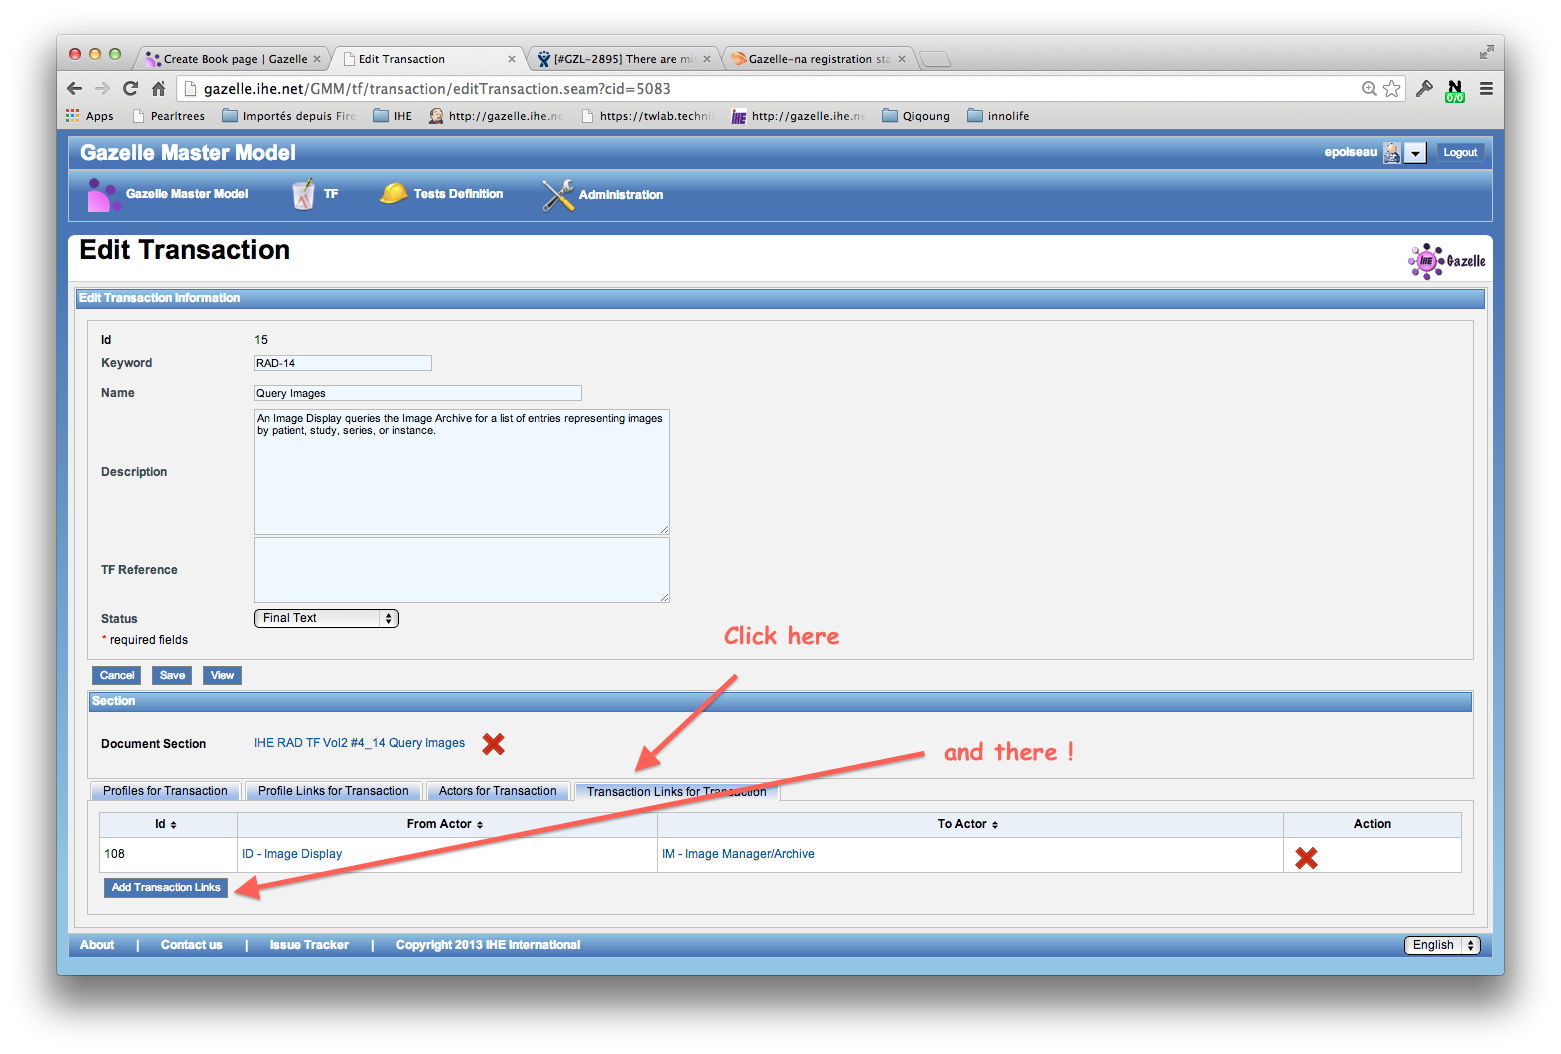
- Click on the Edit icon in the Action column for the transaction you found.
- On the Edit Transaction page, select the Transactions Links for Transaction tab, then click the Add Transaction Links button.
- Select the appropriate actors from the From Actor and To Actor list.
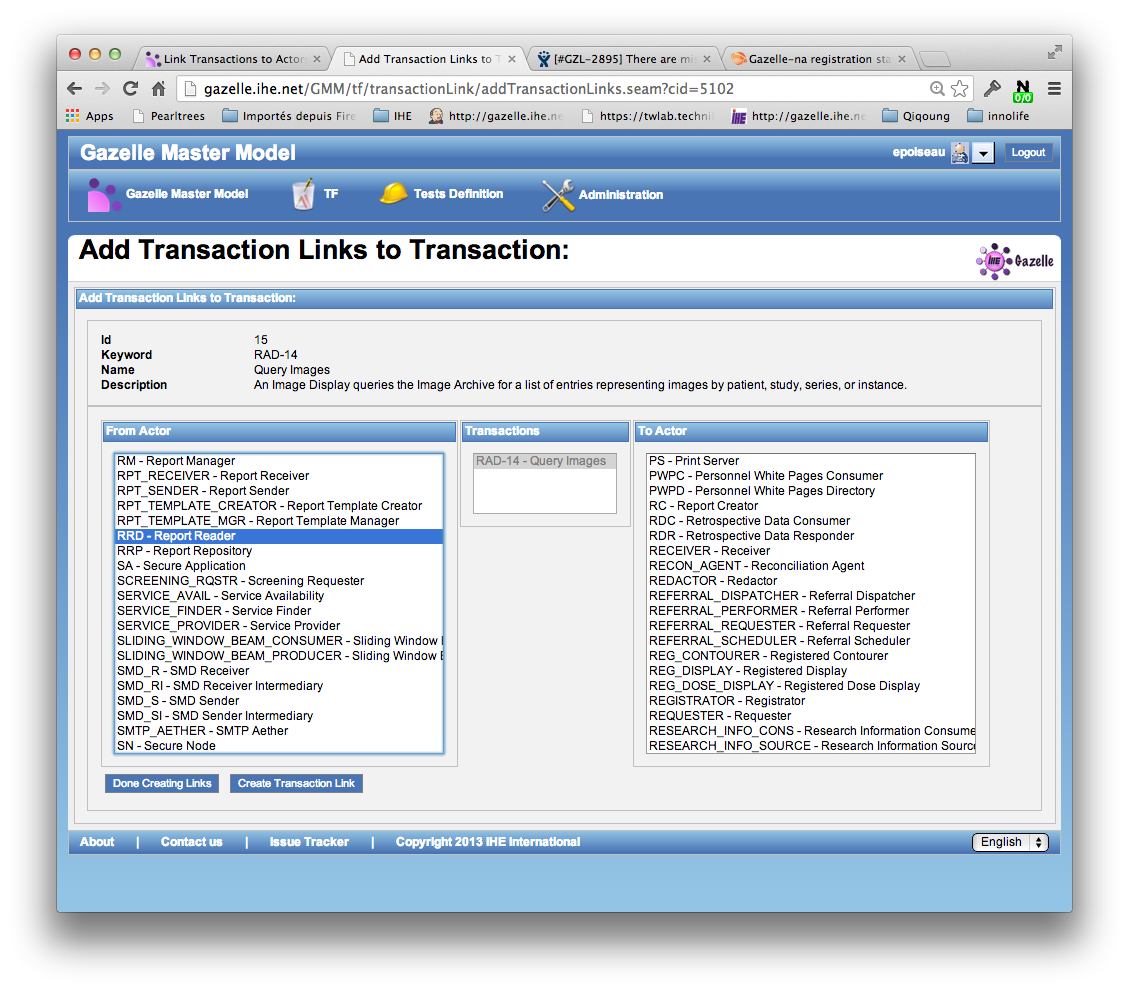
- Click the Create Transaction Link button. Repeat as needed, then click the Done creating links button
- Verify the accuracy of your data entry by going back to review the Transaction links for Transaction tab.