HMW Simulator : How to get started
Get a Gazelle account
First of all, note that, like the other applications from Gazelle testing platform, the HMW Simulator is linked to our CAS service. That means that, if you have an account created in Gazelle, you can use it, if you do not have one, you can create one now by filling the form here. Create an account in Gazelle is free. The login link ("cas login") is located in the top right corner of the page.
Be careful, you must be logged in order to use the HMW Simulator.
Registration of Systems Under Test (SUT) acting as HL7 responders
If your system acts as an HL7 responder in one of the transactions offered by the simulator (for example your system is an Pharmaceutical Adviser and supports PHARM-H1 transaction), you will have to enter its configuration in the application. (No need to enter one configuration per transaction for your SUT. For example, the Pharmaceutical Adviser acts as a responder for the transaction PHARM-H1 and PHARM-H3. Just need to enter one configuration for your Pharmaceutical Adviser SUT.)
In order to proceed, go to "System Configurations" and hit the "Create a Configuration" button. You can also copy ![]() or Edit
or Edit ![]() an existing configuration (one of yours !).
an existing configuration (one of yours !).
In both cases, the simulator needs to know:
- A name for your configuration (displayed in the drop-down list menus)
- The actor played by your system under test
- The receiving facility/application
- The IP address
- The port the system is listening on
- The charset expected by your SUT
If you are logged in when creating the configuration, you will be set as the owner of the configuration. If you do not want other testers to send messages to your SUT you can uncheck the box "Do you want this configuration to be public?" and you will be the only one to be able to select your system in the drop-down list and to edit it (if logged in!).
Before sending messages to your system under test, ensure that your firewall options give to HMW Simulator the access to your system.
What is the Workflow Setup in the HMW Simulator and how to manage it
More than a big simulator for all actors acting in the HMW Supplement, the HMW Simulator simulates a typical workflow concerning the prescription, dispensing, distribution and administration of medication.
What does it means for the user ?
After to have enter your SUT configuration, you must create your own workflow setup. Each workflow setup will be linked to your gazelle account. So, you will be the only one to allow to modify your workflow setup. To create a new workflow setup, go to the workflow setup menu, enter the name of your workflow setup and configure each actors singly, below the sequence diagram.


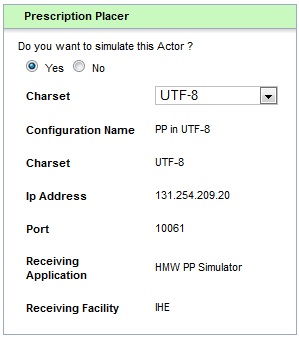
For each actors, you can decide to simulate this actor and choose the charset that you desire to use, OR select your SUT configuration in order to test your SUT. For example, if you want to test your Medication Dispenser actor, you will simulate the Prescription Placer, Pharmaceutical Adviser and the Administration Informer actors. Of course, you can have more than one SUT actor per workflow setup (with a maximum of three SUT).
About the color of the actor panel configuration header, the green means that the actor will be simulated, and the blue means the actor will be not simulated.
Don't forget to save your configuration in using the button below :
![]()
Soon as your workflow setup is ready, you can go to the next part and begin to use the HMW Simulator.
(If you need to work with a charset which doesn't appear in the charset drop-down list when you simulate an actor, don't hesitate to talk us.)
Visualize/Edit an existing Workflow Setup
You have the possibility to visualize or edit an existing Workflow Setup which has been created. For that, select, in the top of the page, the option "Visualize/Edit an existing Workflow Setup". Then, choose, among the available list, the workflow configuration that you desire. You can edit as you want the different actors configuration. Don't forget to save it.

